Before You Upload
Prepare your CSV file so the import goes smoothly:- Combine first and last name into a single column labeled “Name” to match SalesCaptain’s field format.
- Make sure your CSV includes at least a Name and Phone Number.
- Optional: include Email, Opt-in Status, and any Tags as extra columns for richer data.
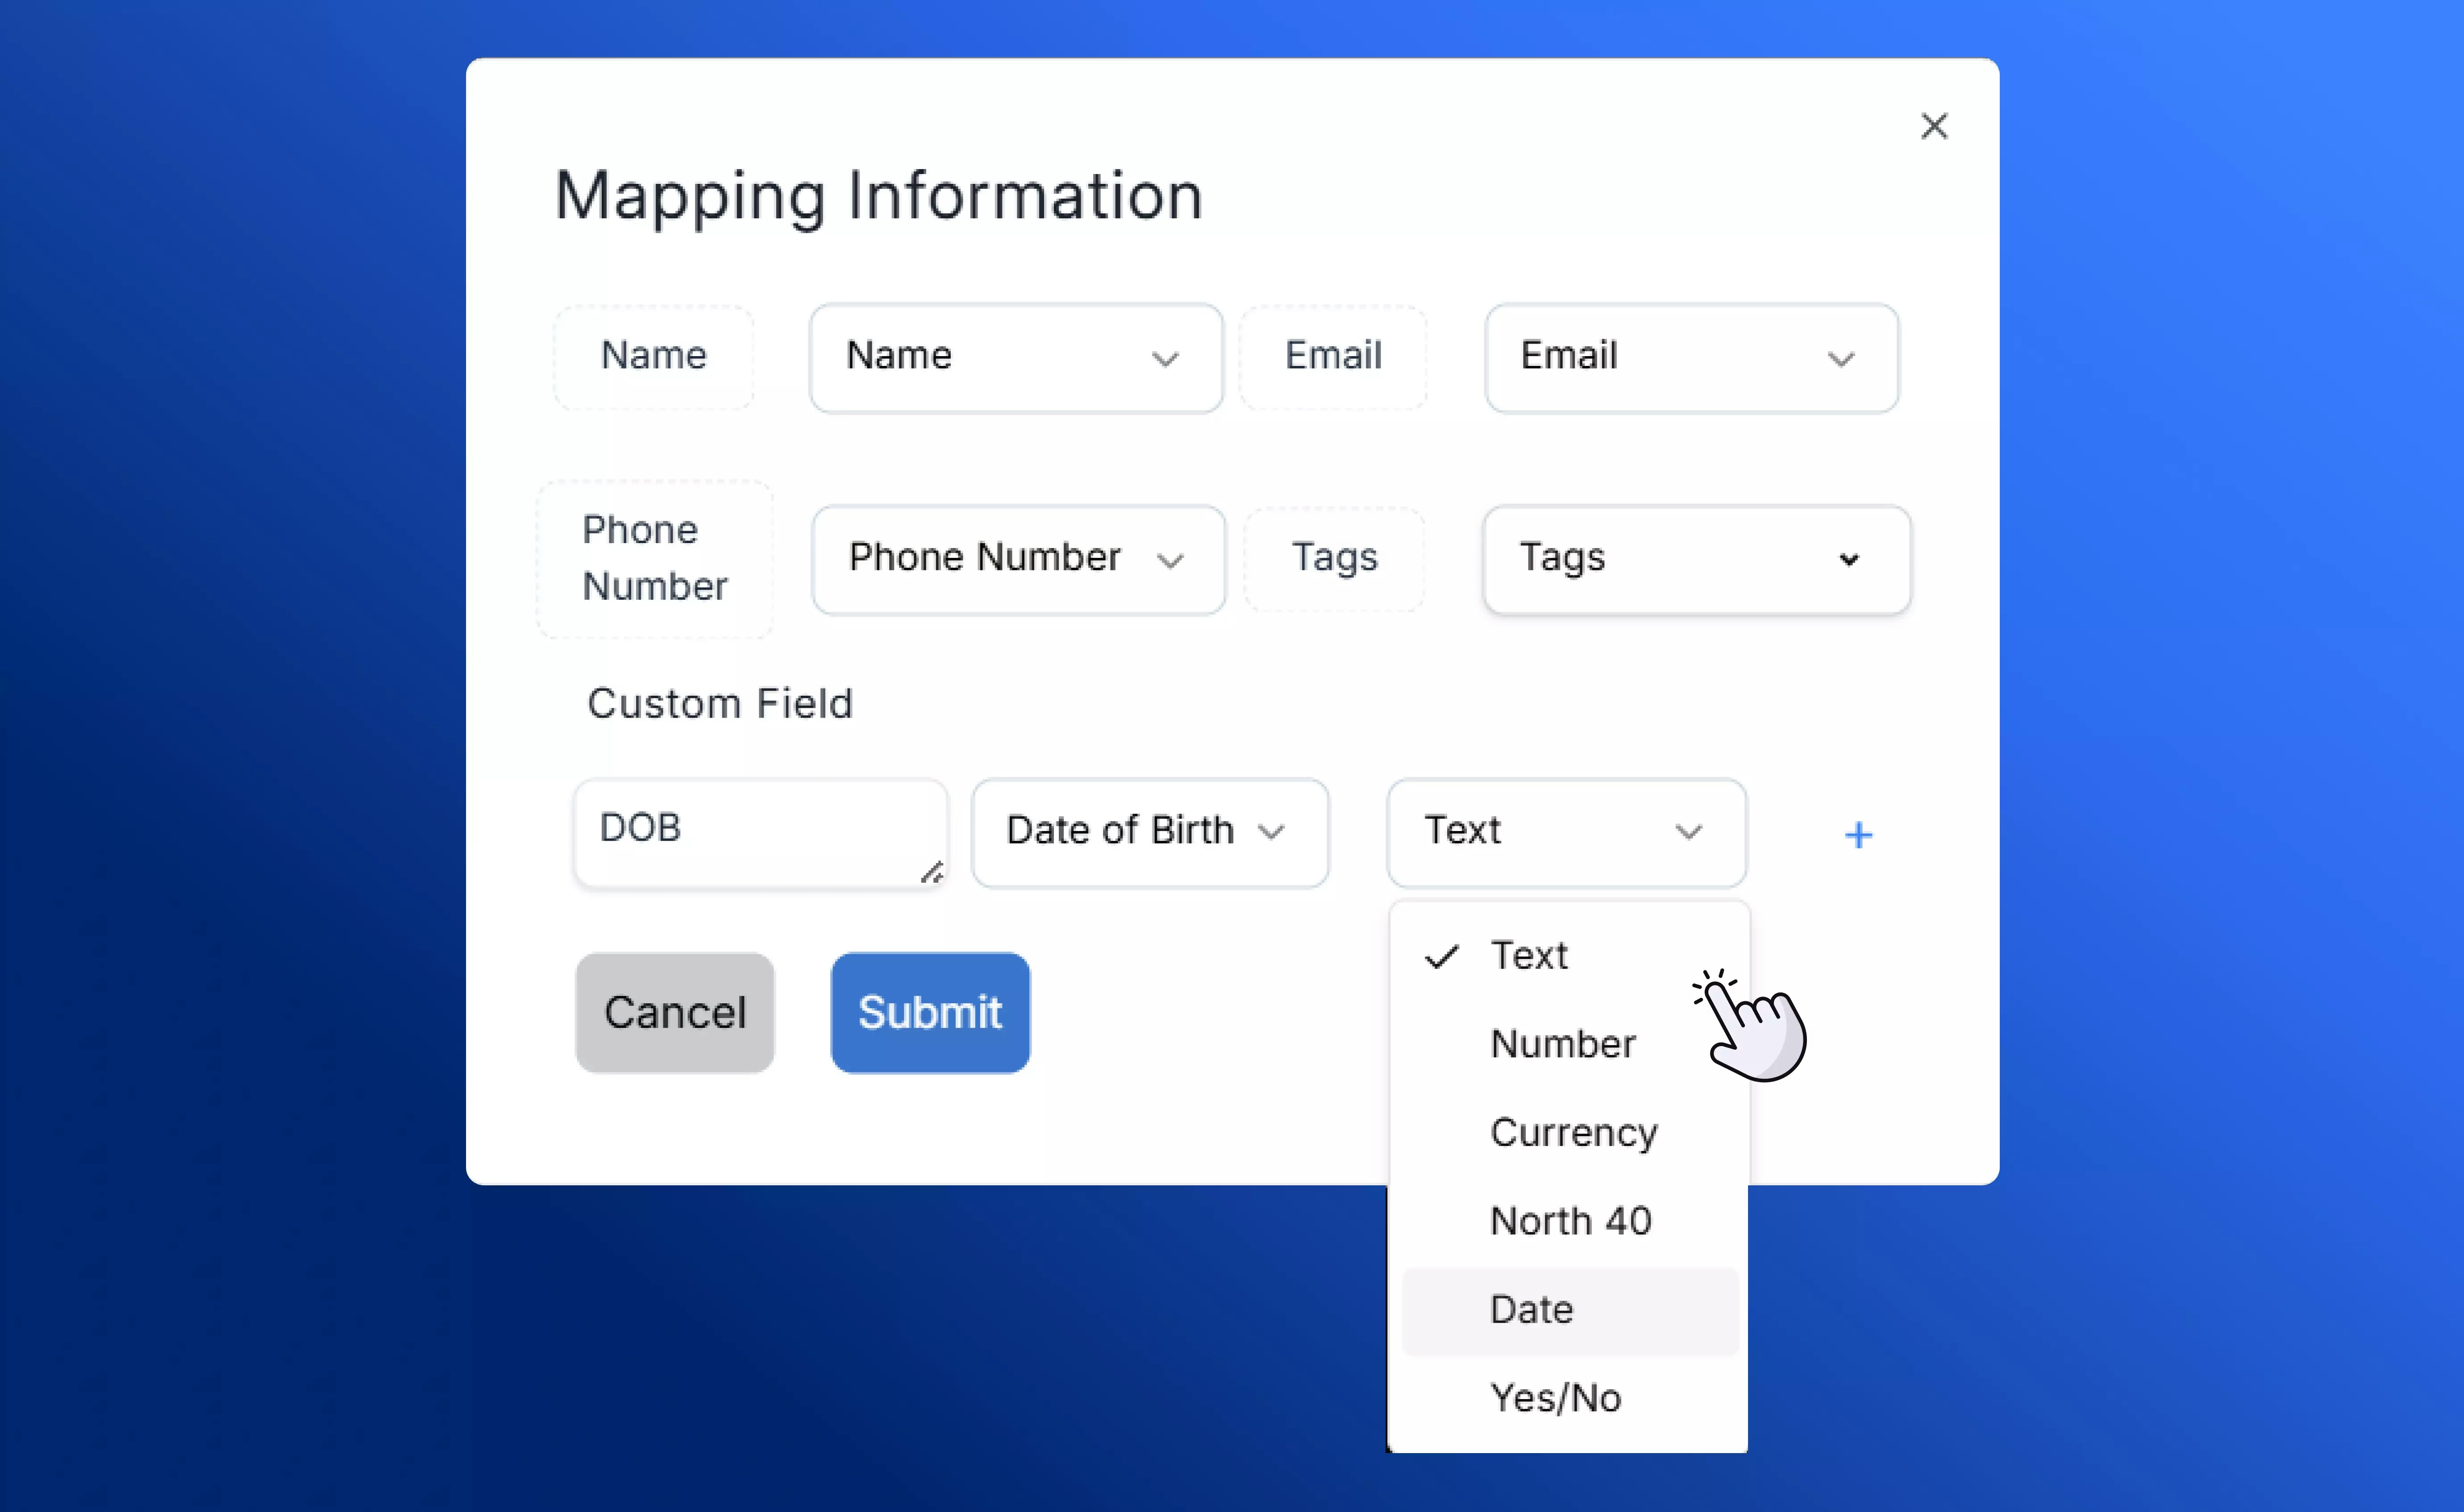
Upload & Map Fields
Once your file is ready, importing takes just a few steps:-
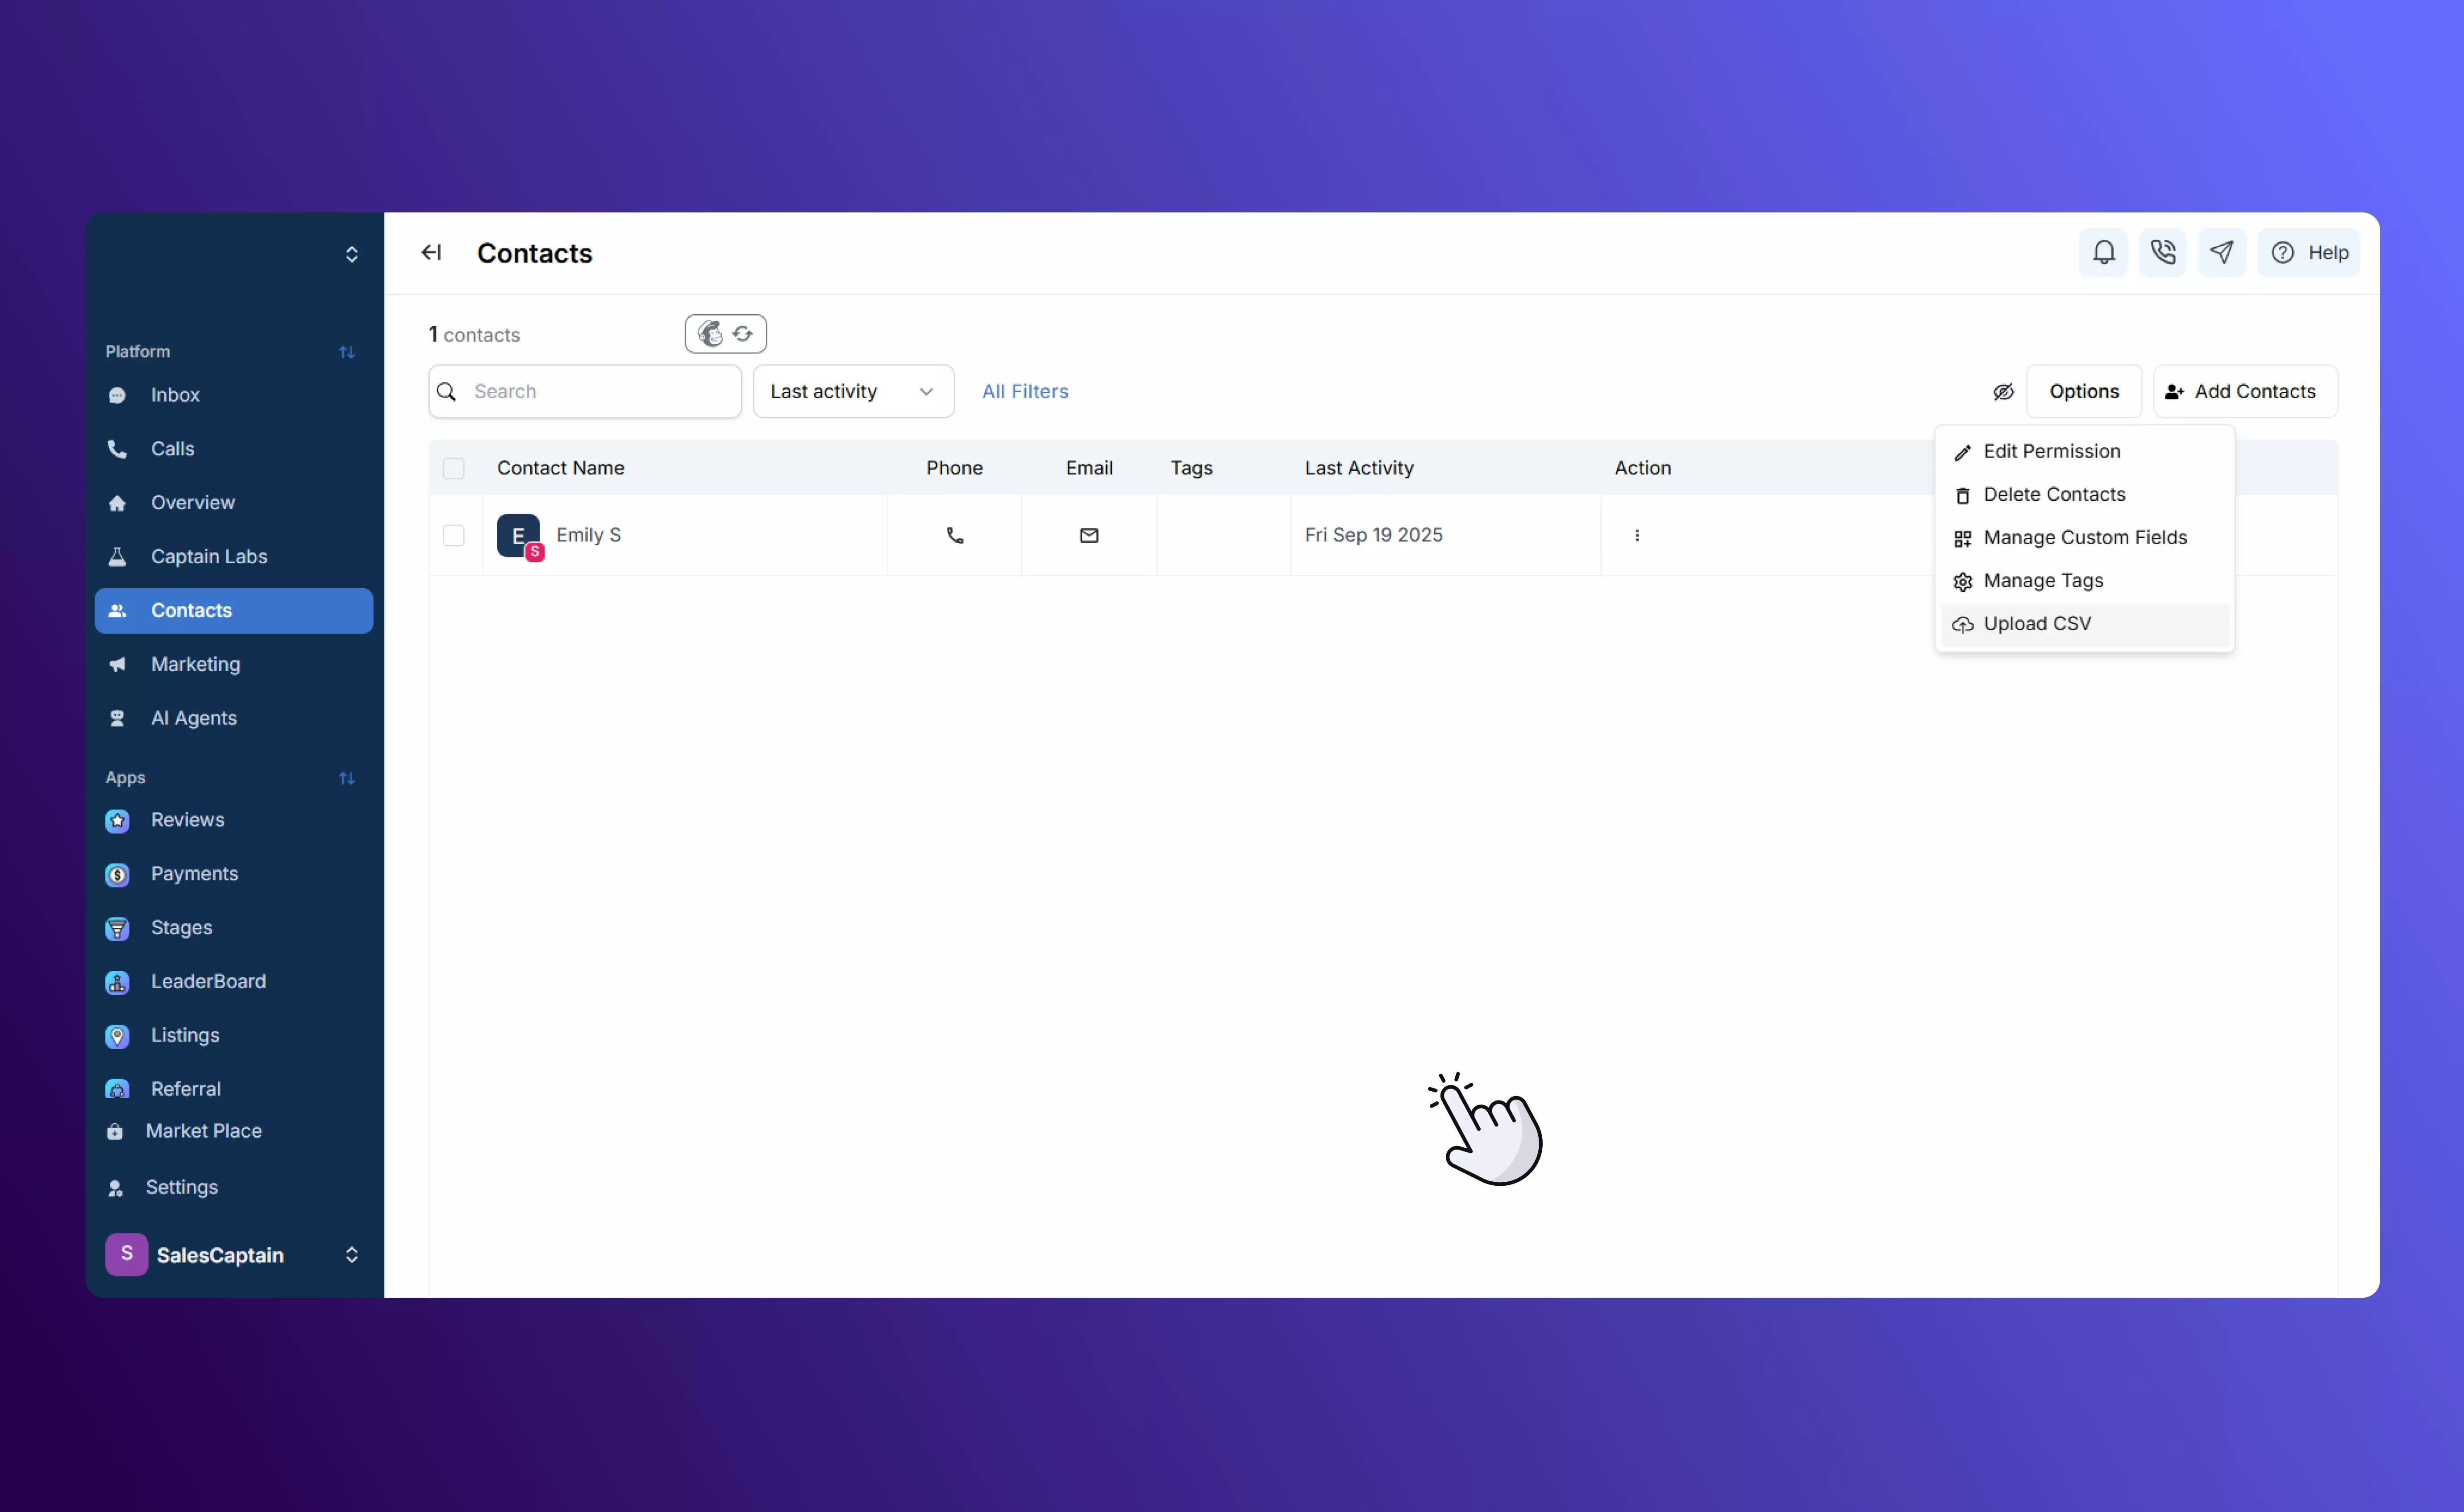
Go to the Contacts tab and select Options before clicking on Upload CSV.
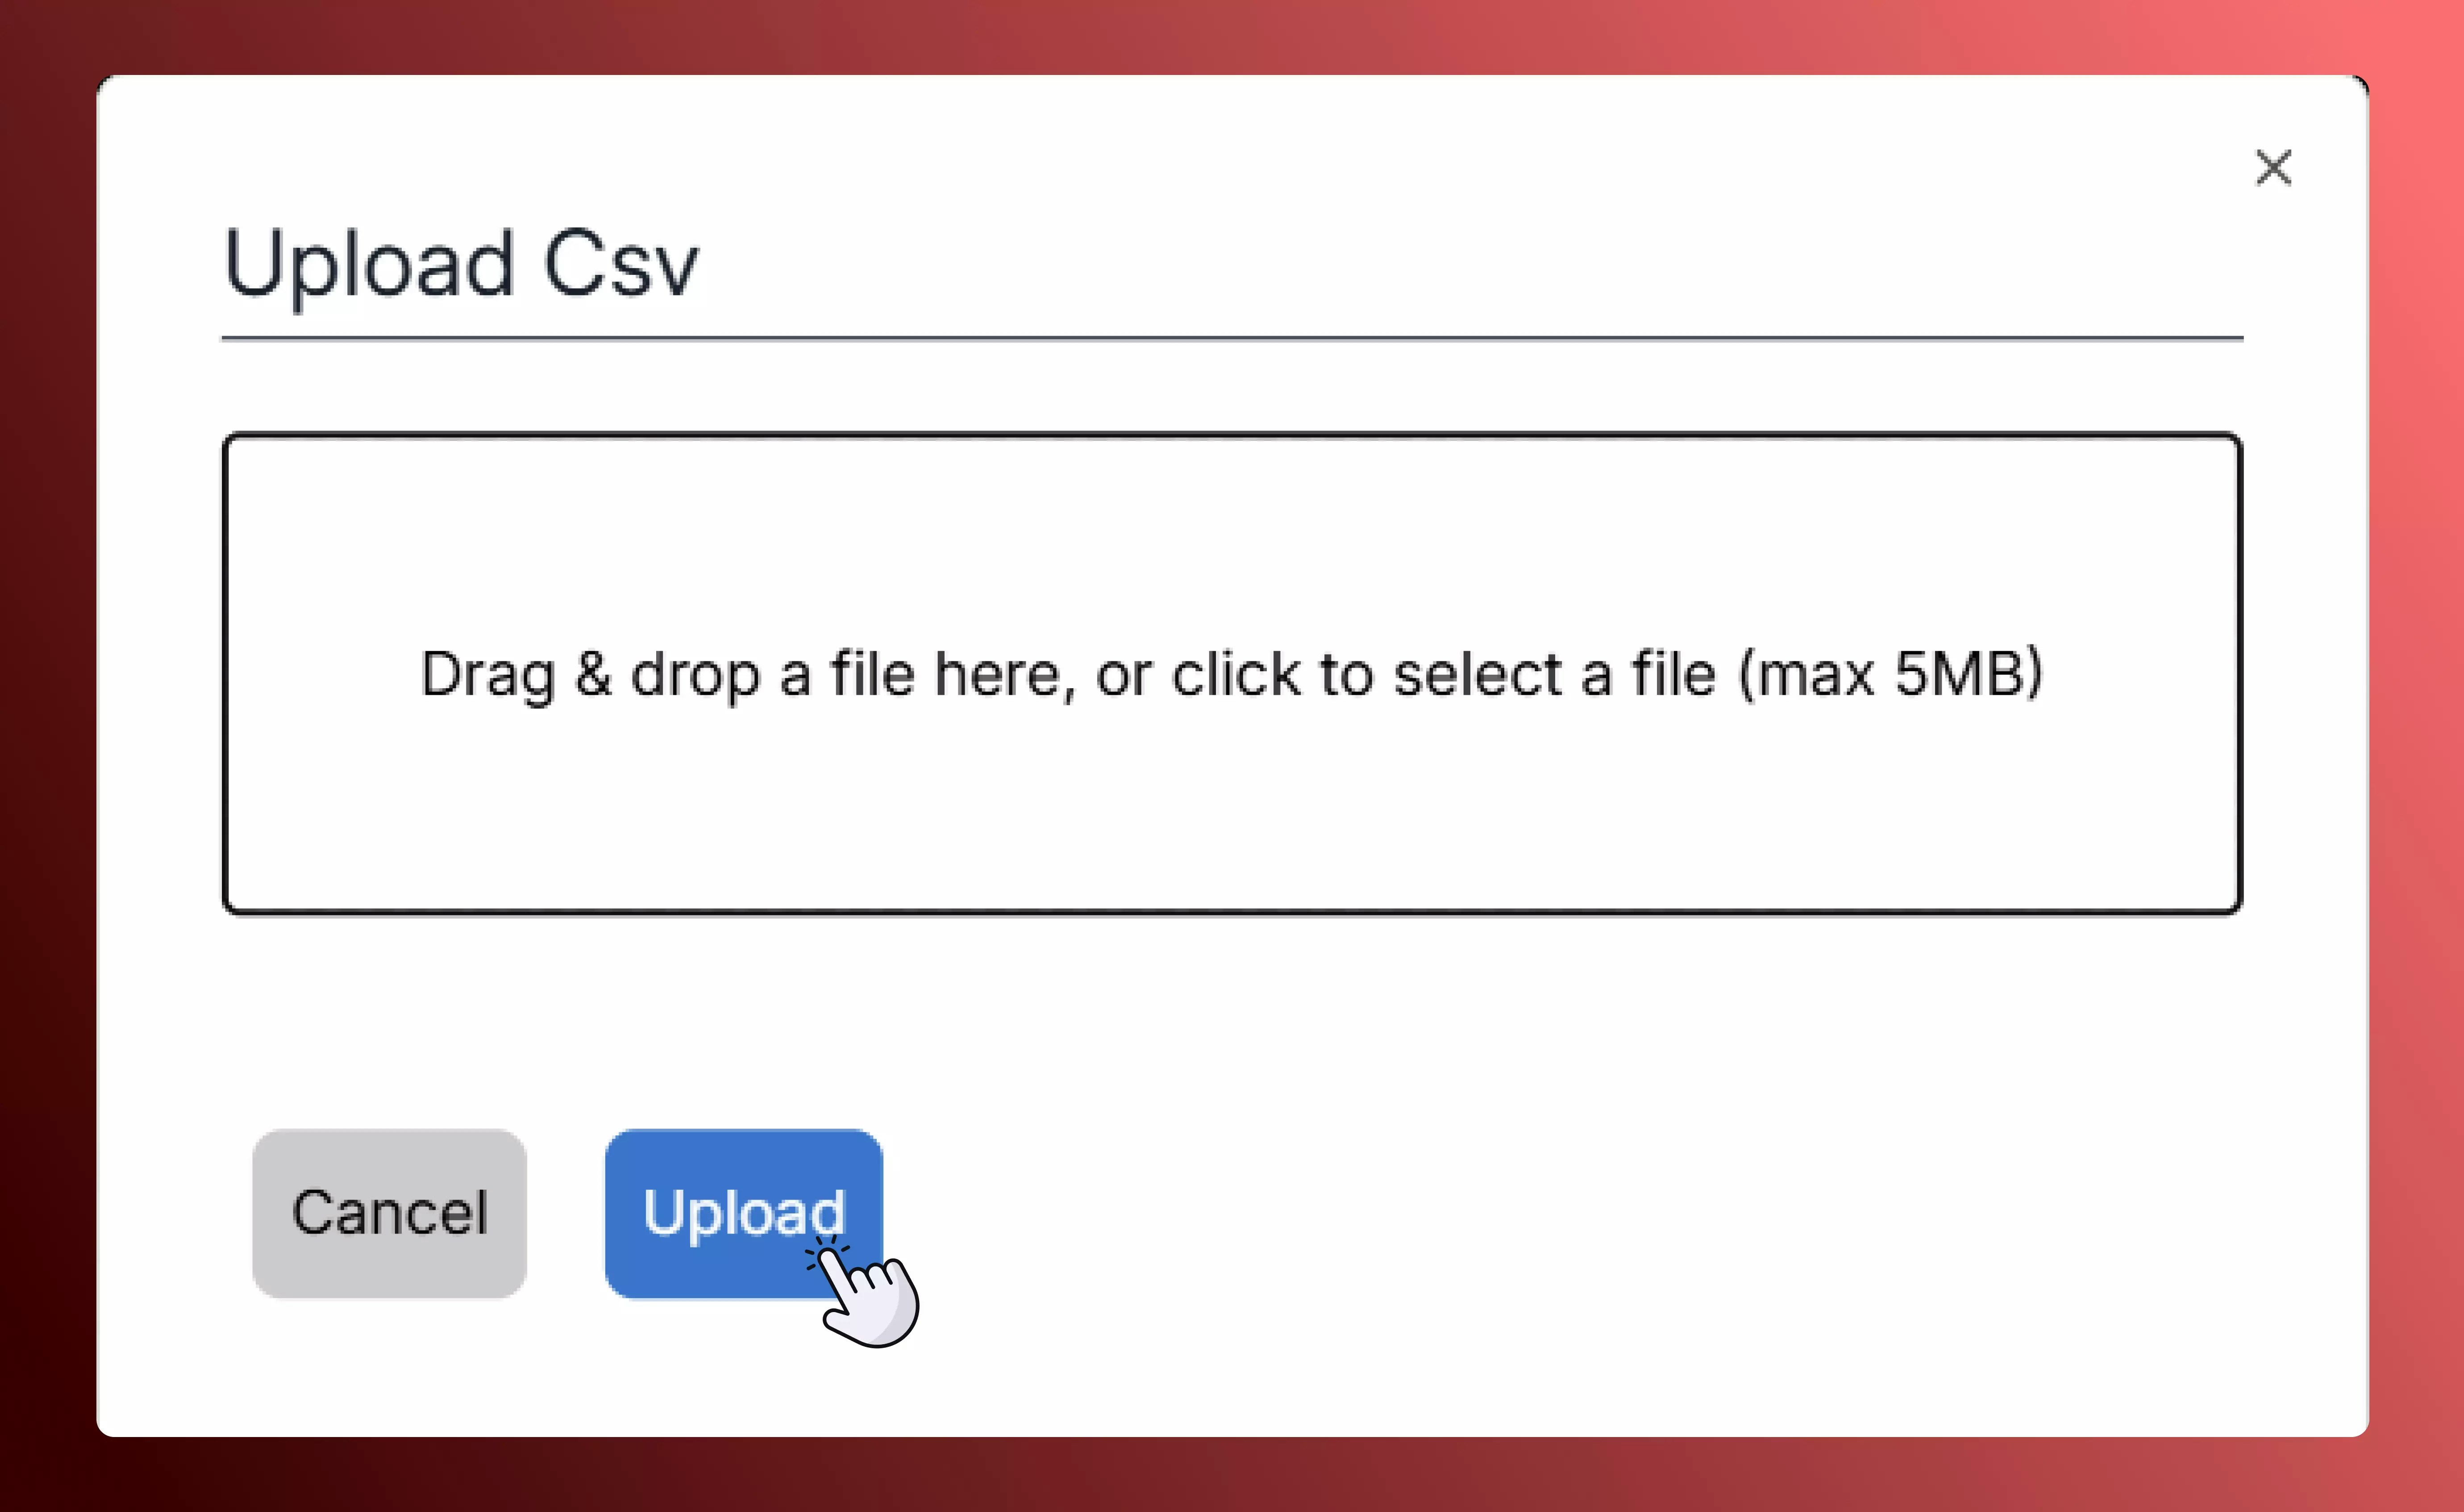
- Upload your CSV file.
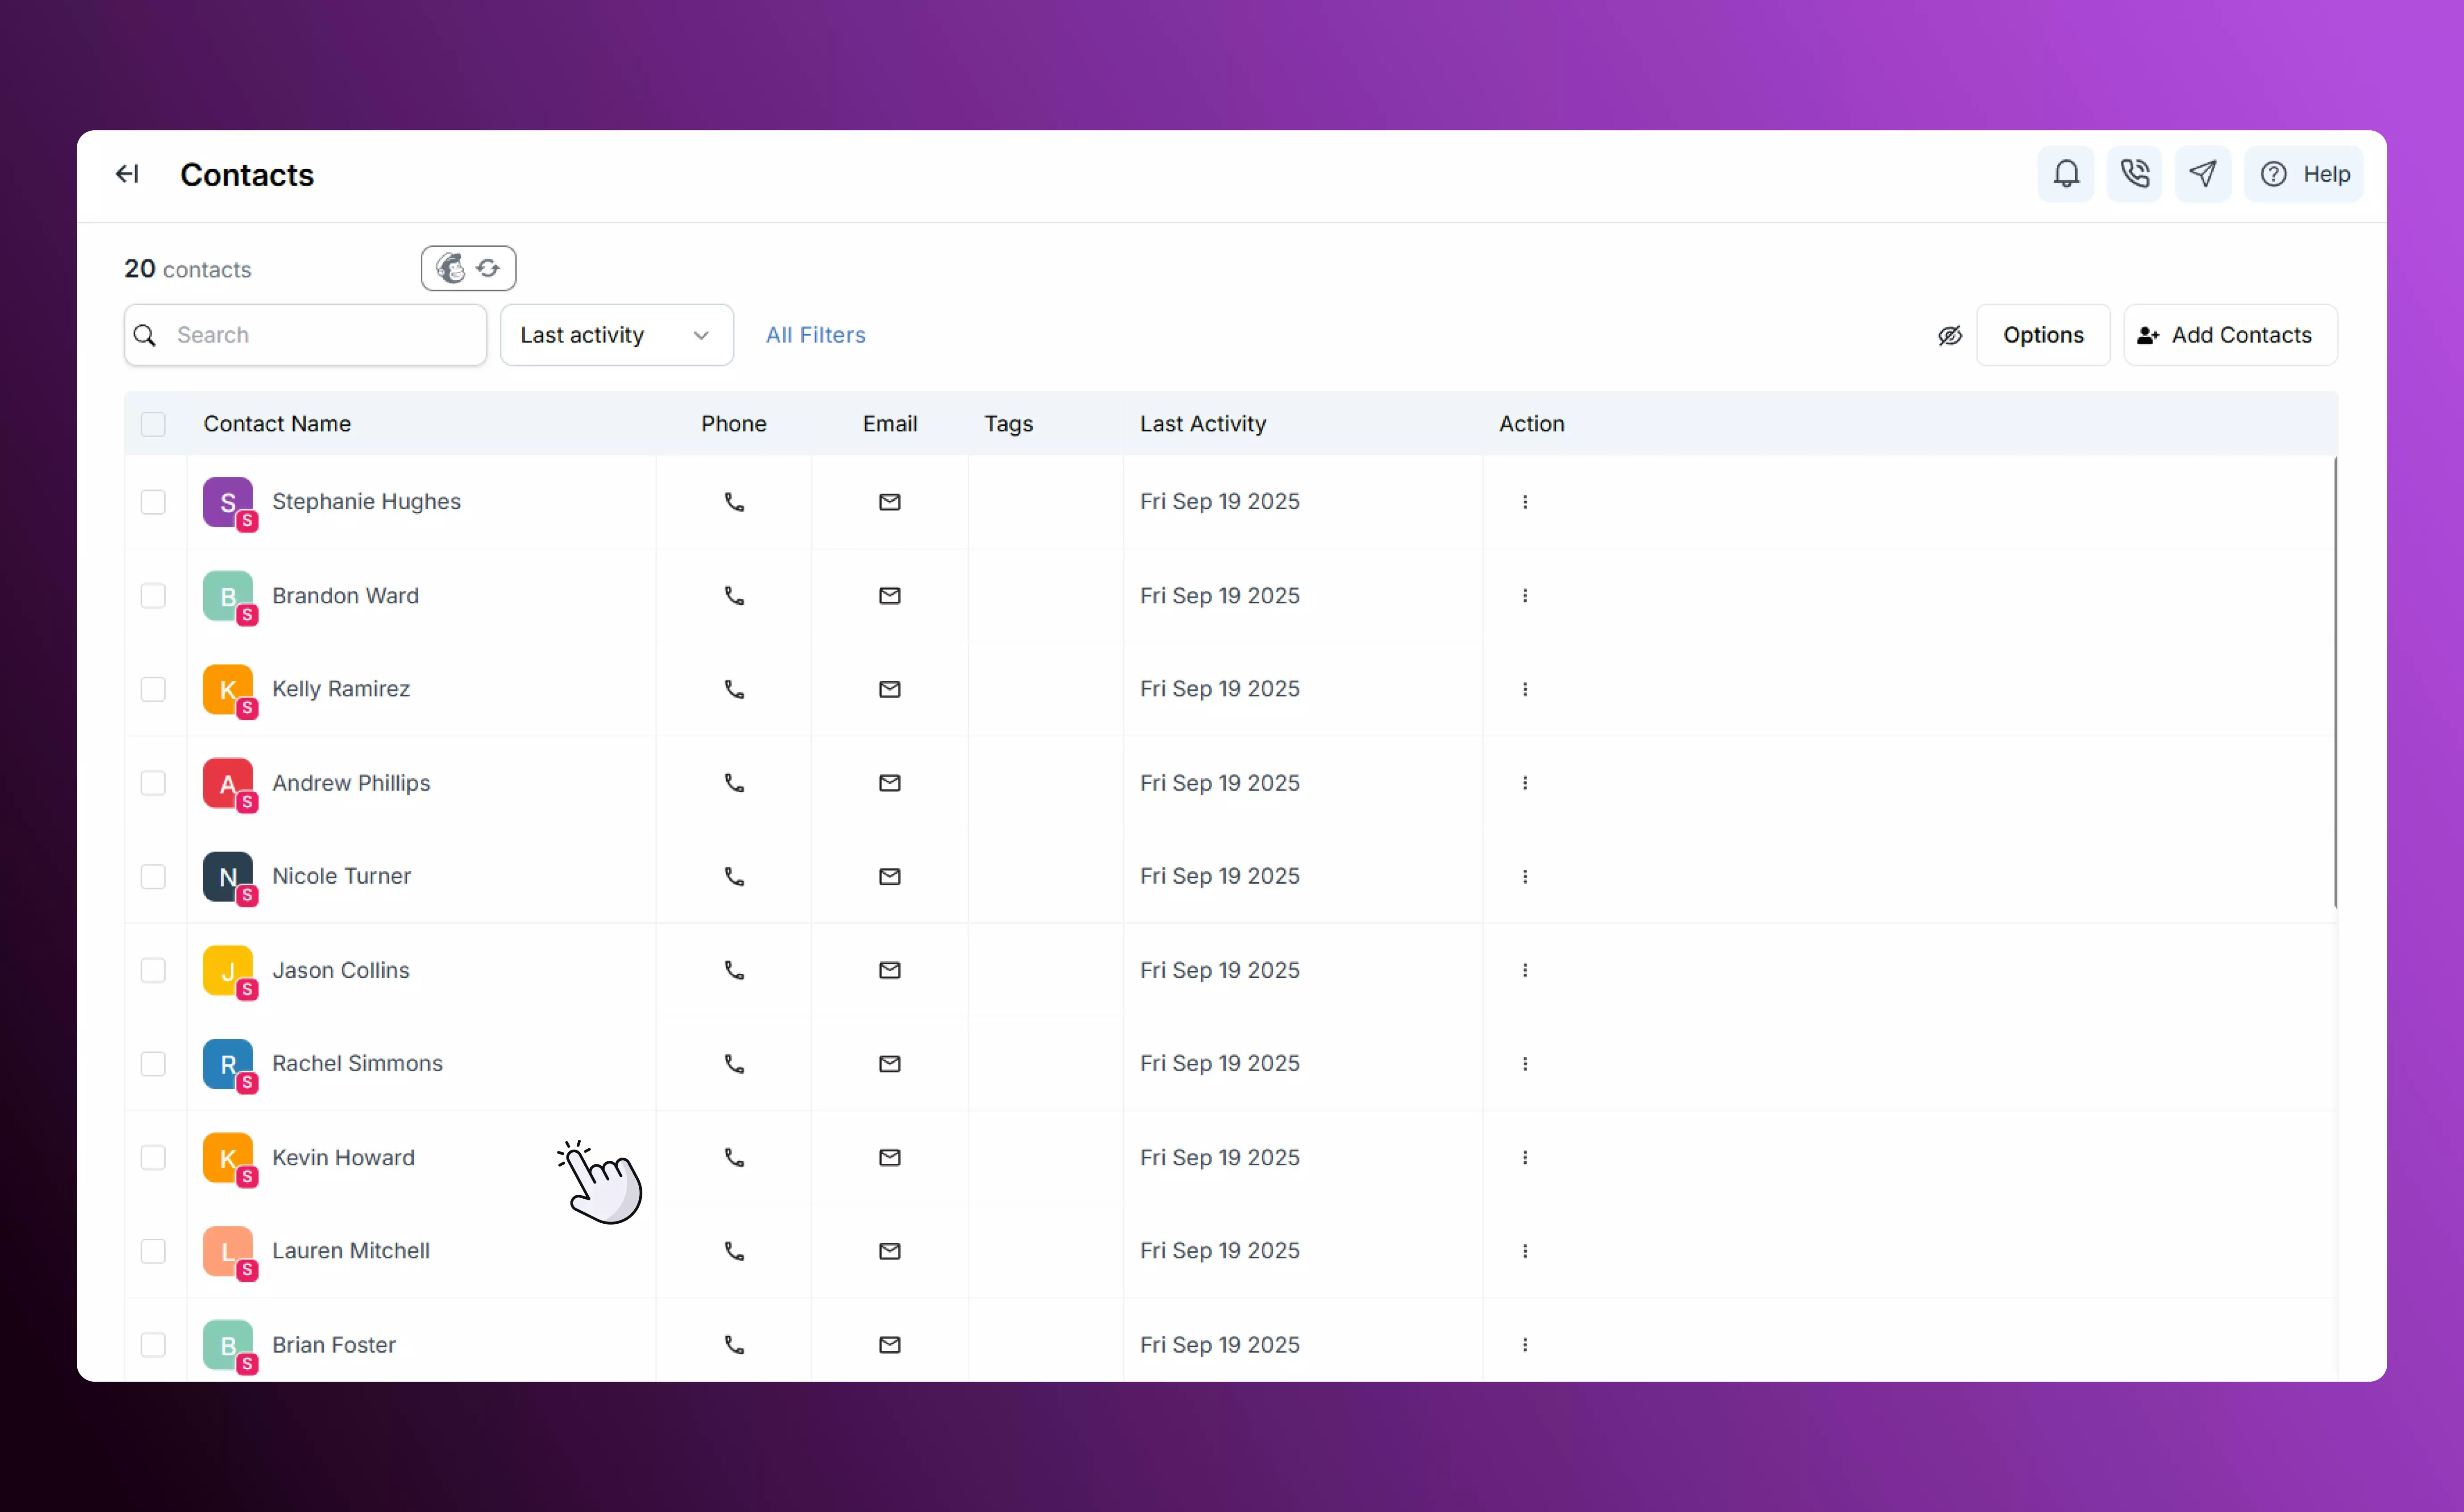
After the Import
Your contacts appear instantly in your Contacts list, ready to use:- Apply tags or start a campaign right away.
- Filter, edit, or export them just like manually added contacts.
- Enjoy seamless integration — imported contacts behave exactly like native SalesCaptain contacts.
Best Practices
- Double-check your CSV formatting before uploading to avoid errors.
- Pre-create any custom fields you know you’ll need.
- Use tags during import to track the source or group of each list.
- Test with a small file first if you’re unsure about your mapping.