Creating Your Agent
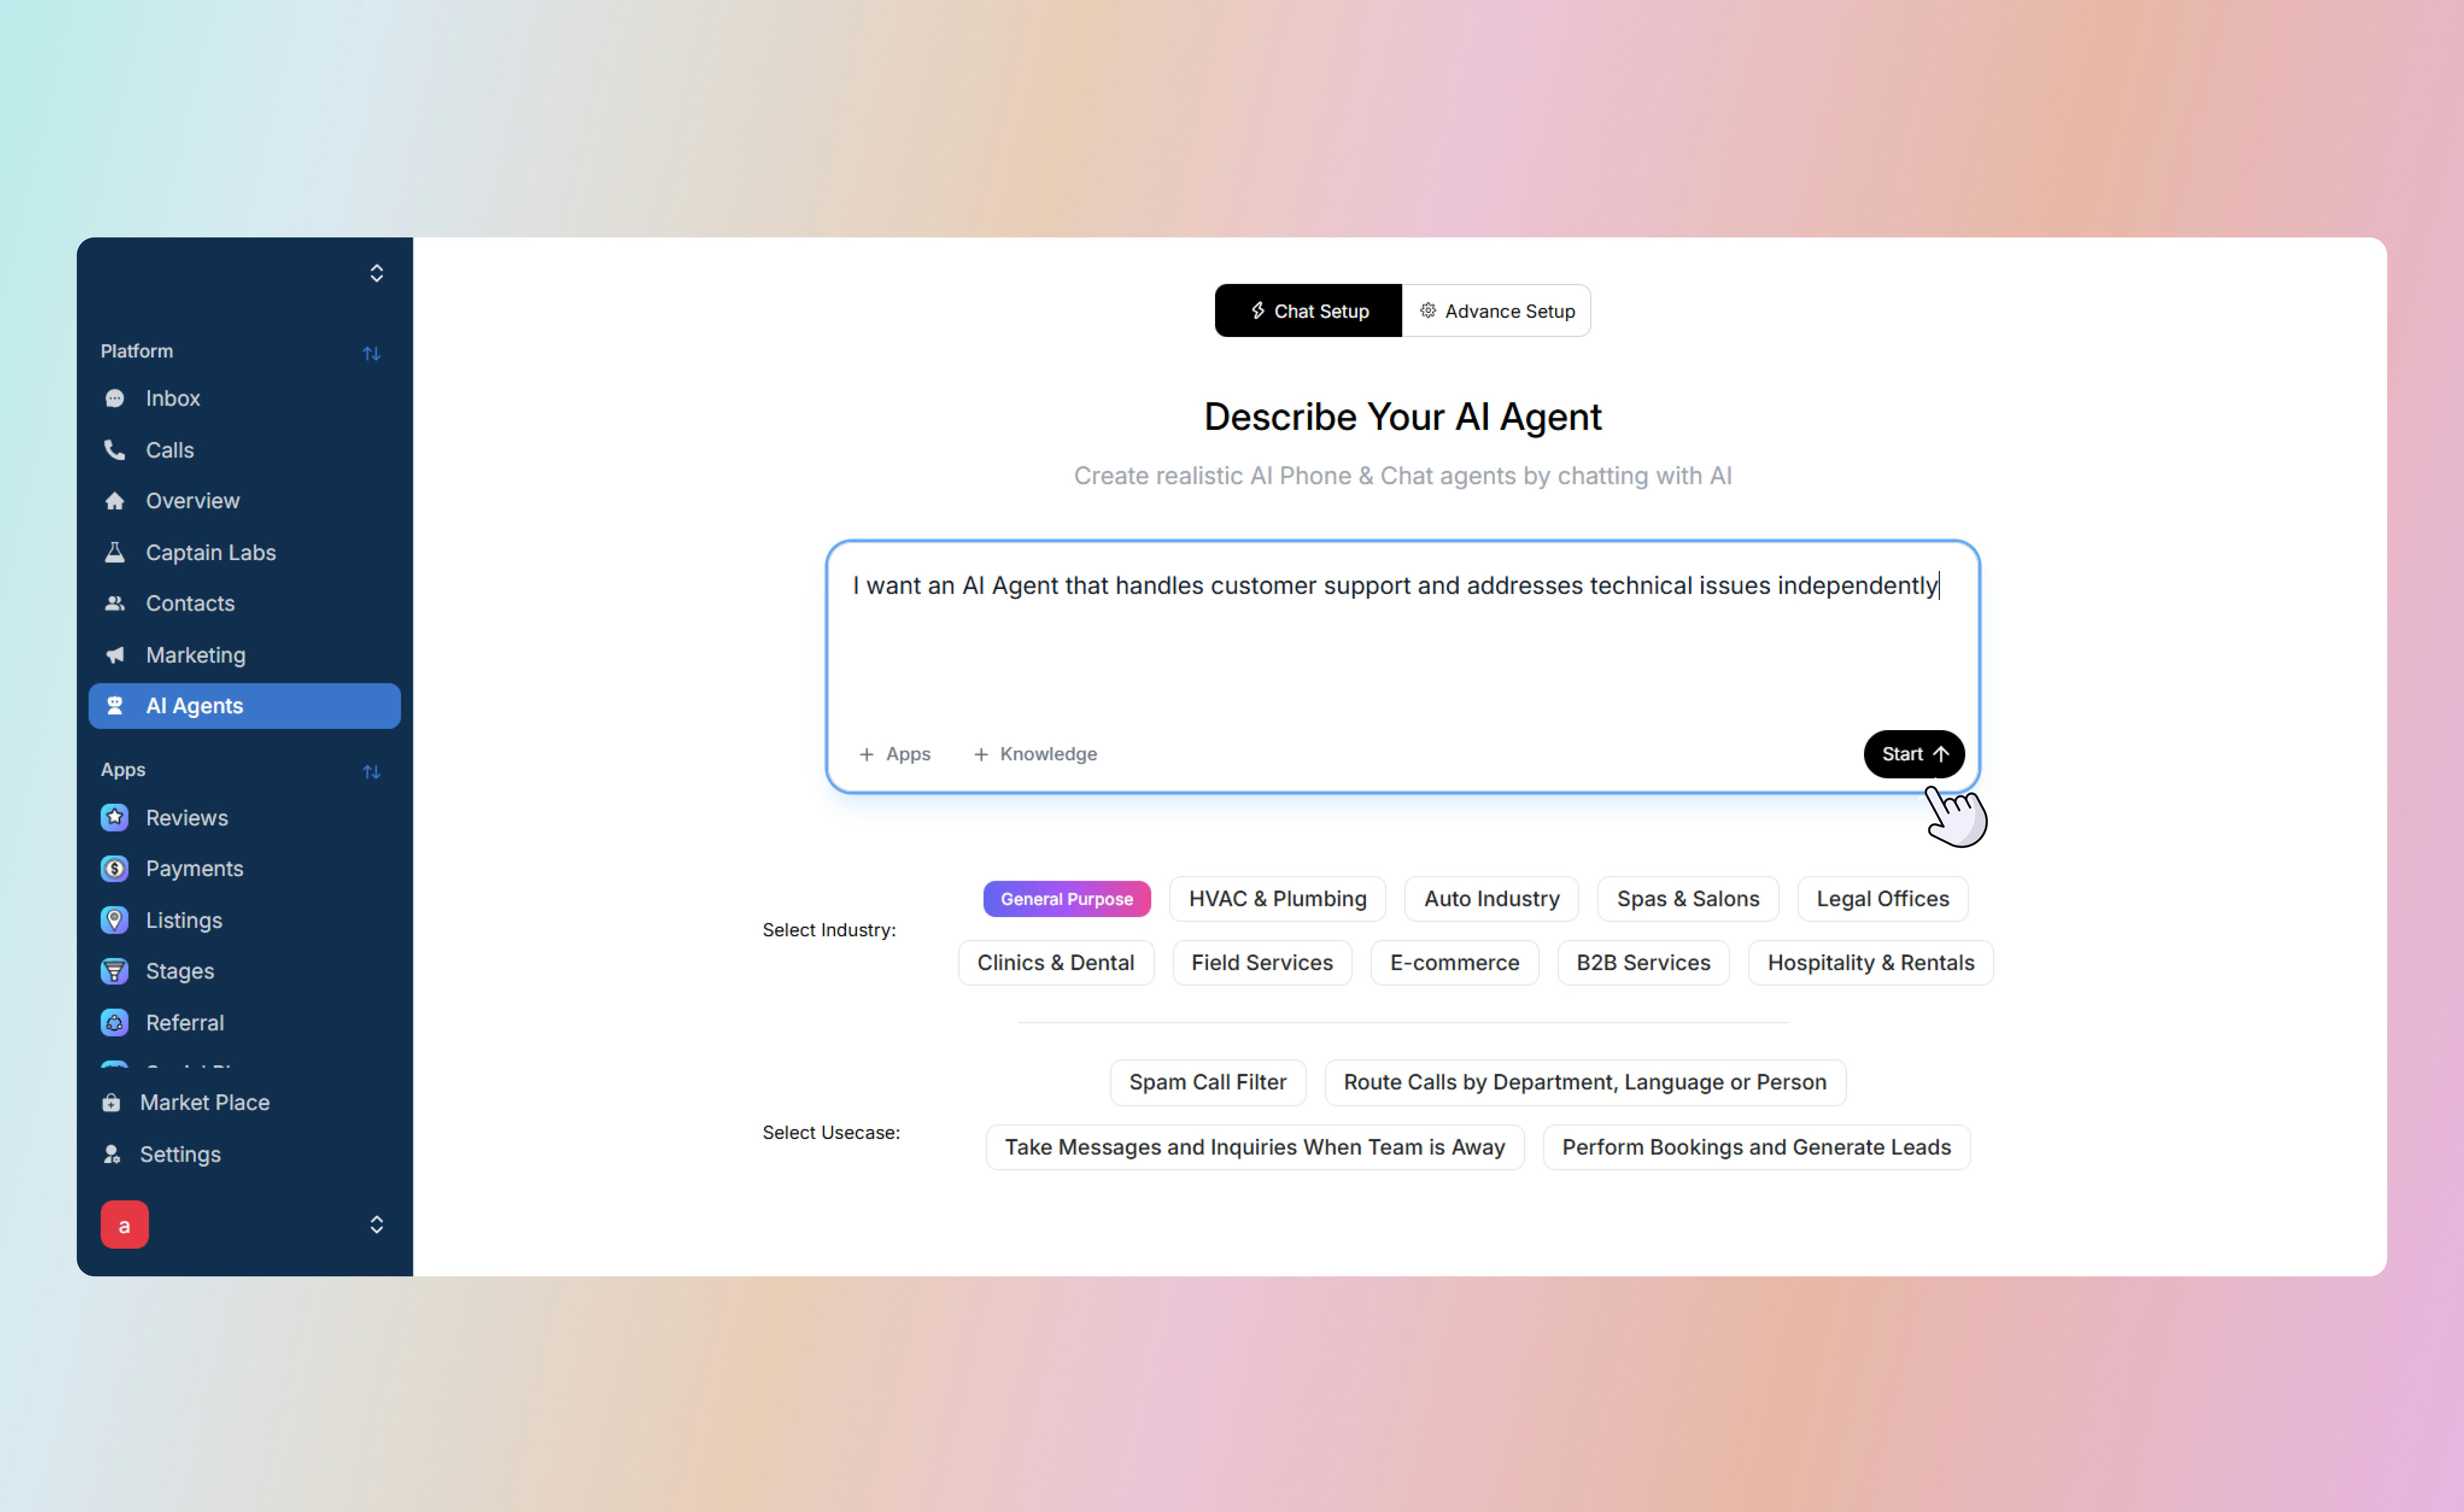
The Chat Setup uses a natural language builder to create your agent. This is the most efficient starting point for business owners and managers.- Navigate to AI Agents: Select the AI Agents tab from the sidebar.
-
Describe Your Goal: In the chat-based builder, type what you want your AI to do.
- Example: “I want an AI Agent that handles customer support and addresses technical issues independently.”
- Select Industry & Use Case: Choose your specific industry to provide the AI with relevant context.
-
Leverage Prebuilt Blueprints: Select from industry-specific examples to accelerate setup:
- Appointment Booking: Ideal for Med Spas, dental clinics, or salons.
- Spam Filtering: Designed for retail environments to reduce noise.
- Call Routing: Specialized for dealerships or high-volume service centers.
-
Generation: Captain AI will process your instructions and present a ready-to-use agent, such as “Cora,” who can handle troubleshooting and escalate complex cases.
Intelligence and Integrations
To ensure your agent is effective, you must provide it with business-specific knowledge and the ability to perform tasks in your existing software stack.Knowledge Base
Train your agent in the Knowledge section to ensure it provides accurate information:- Document Upload: Add PDFs or CSV files containing pricing, FAQs, or service lists.
- Website Sync: Provide URLs for the agent to draw information directly from your site.
- Conversation Sync: Sync past interactions to help the agent learn your team’s specific communication style and preferred answers.
Connecting Third-Party Apps
Enable your AI Agent to execute tasks by connecting third-party applications within the message box:- Scheduling: Connect Housecall Pro to allow the agent to book appointments directly.
- CRM Management: Link Clio, Zoho, or Shopify to create contacts, update lead statuses, or fetch customer order history.
- Automation: Once connected, the agent can trigger these actions autonomously during a live interaction.
Testing and AutoTune
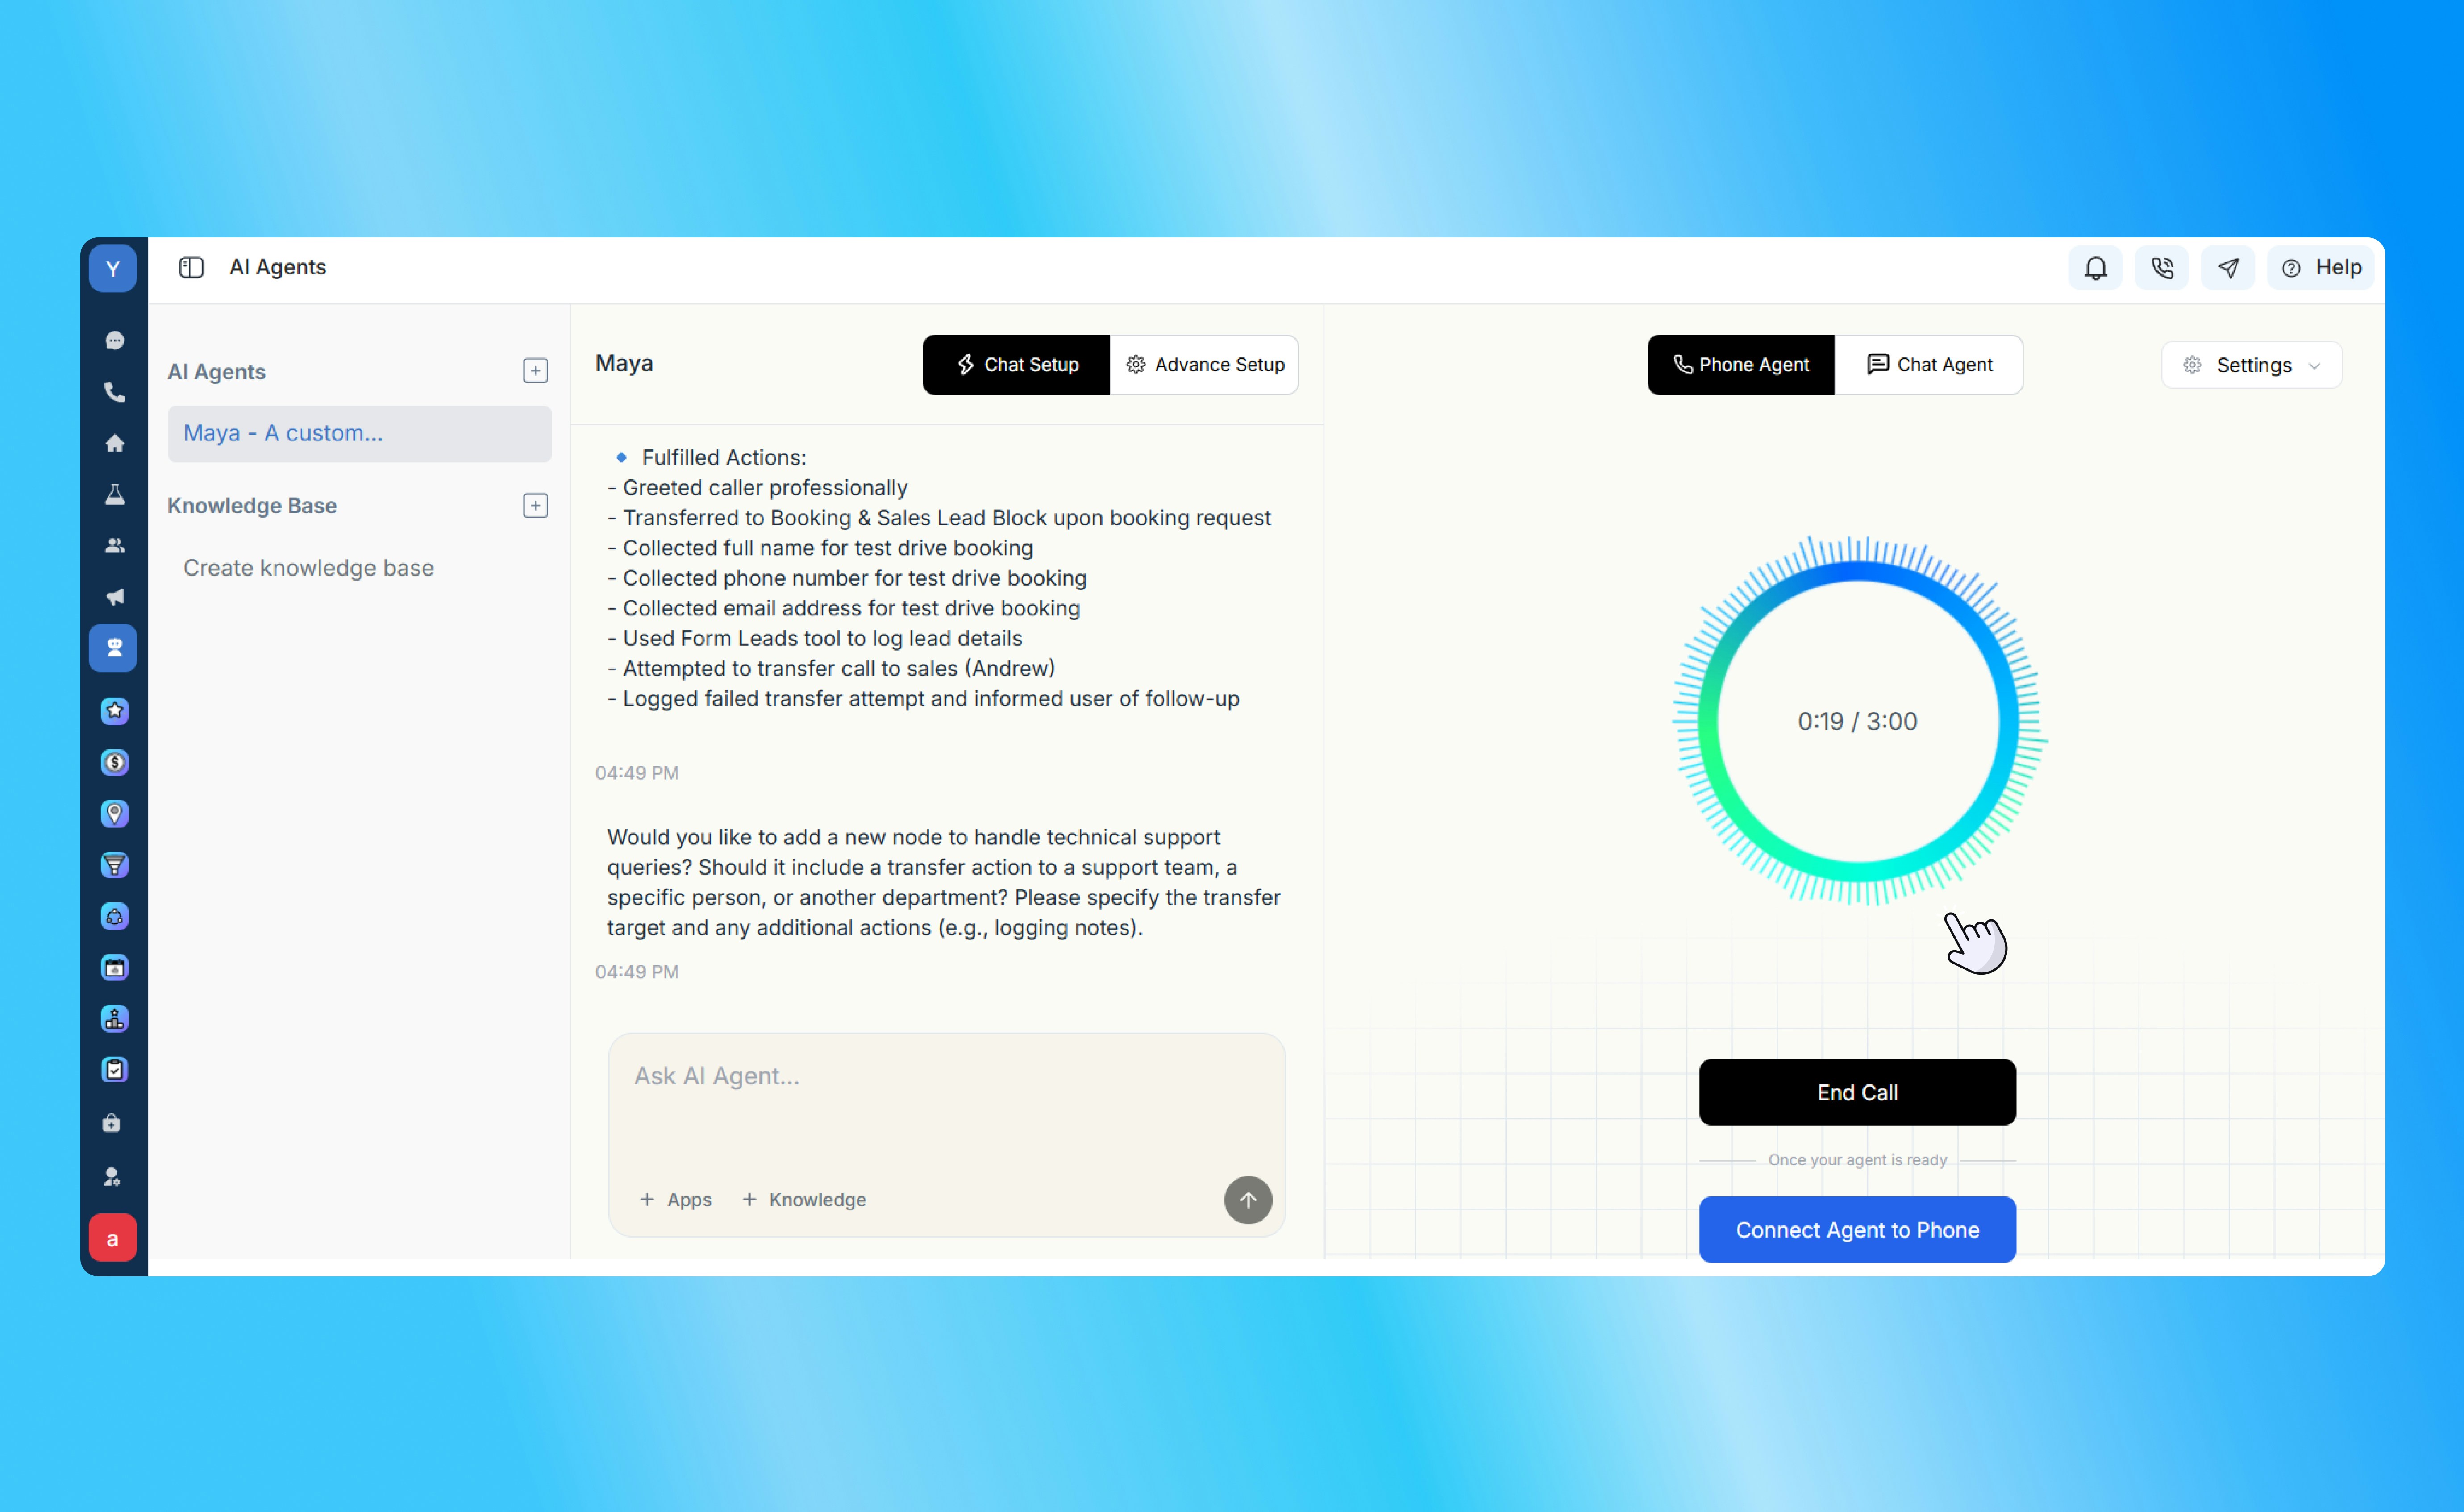
Use Test Mode to interact with your agent via phone or chat before deploying it to customers.- Voice and Personality: Use the settings to adjust the voice, tone, and warmth. You can select unique voices to match your brand identity.
- AutoTune Toggle: When enabled, Captain AI evaluates your testing conversations. It automatically makes necessary changes to the prompts and logic to ensure the agent meets your specific requirements.
- Session Review: Review interaction logs in the chat after every text conversation to see the exact nodes and steps the agent followed.
-
Tip: Act out various real-life scenarios. Use the Captain AI evaluation to identify points where a node should be triggered or where an action (like a call transfer) is necessary.
Advanced Setup
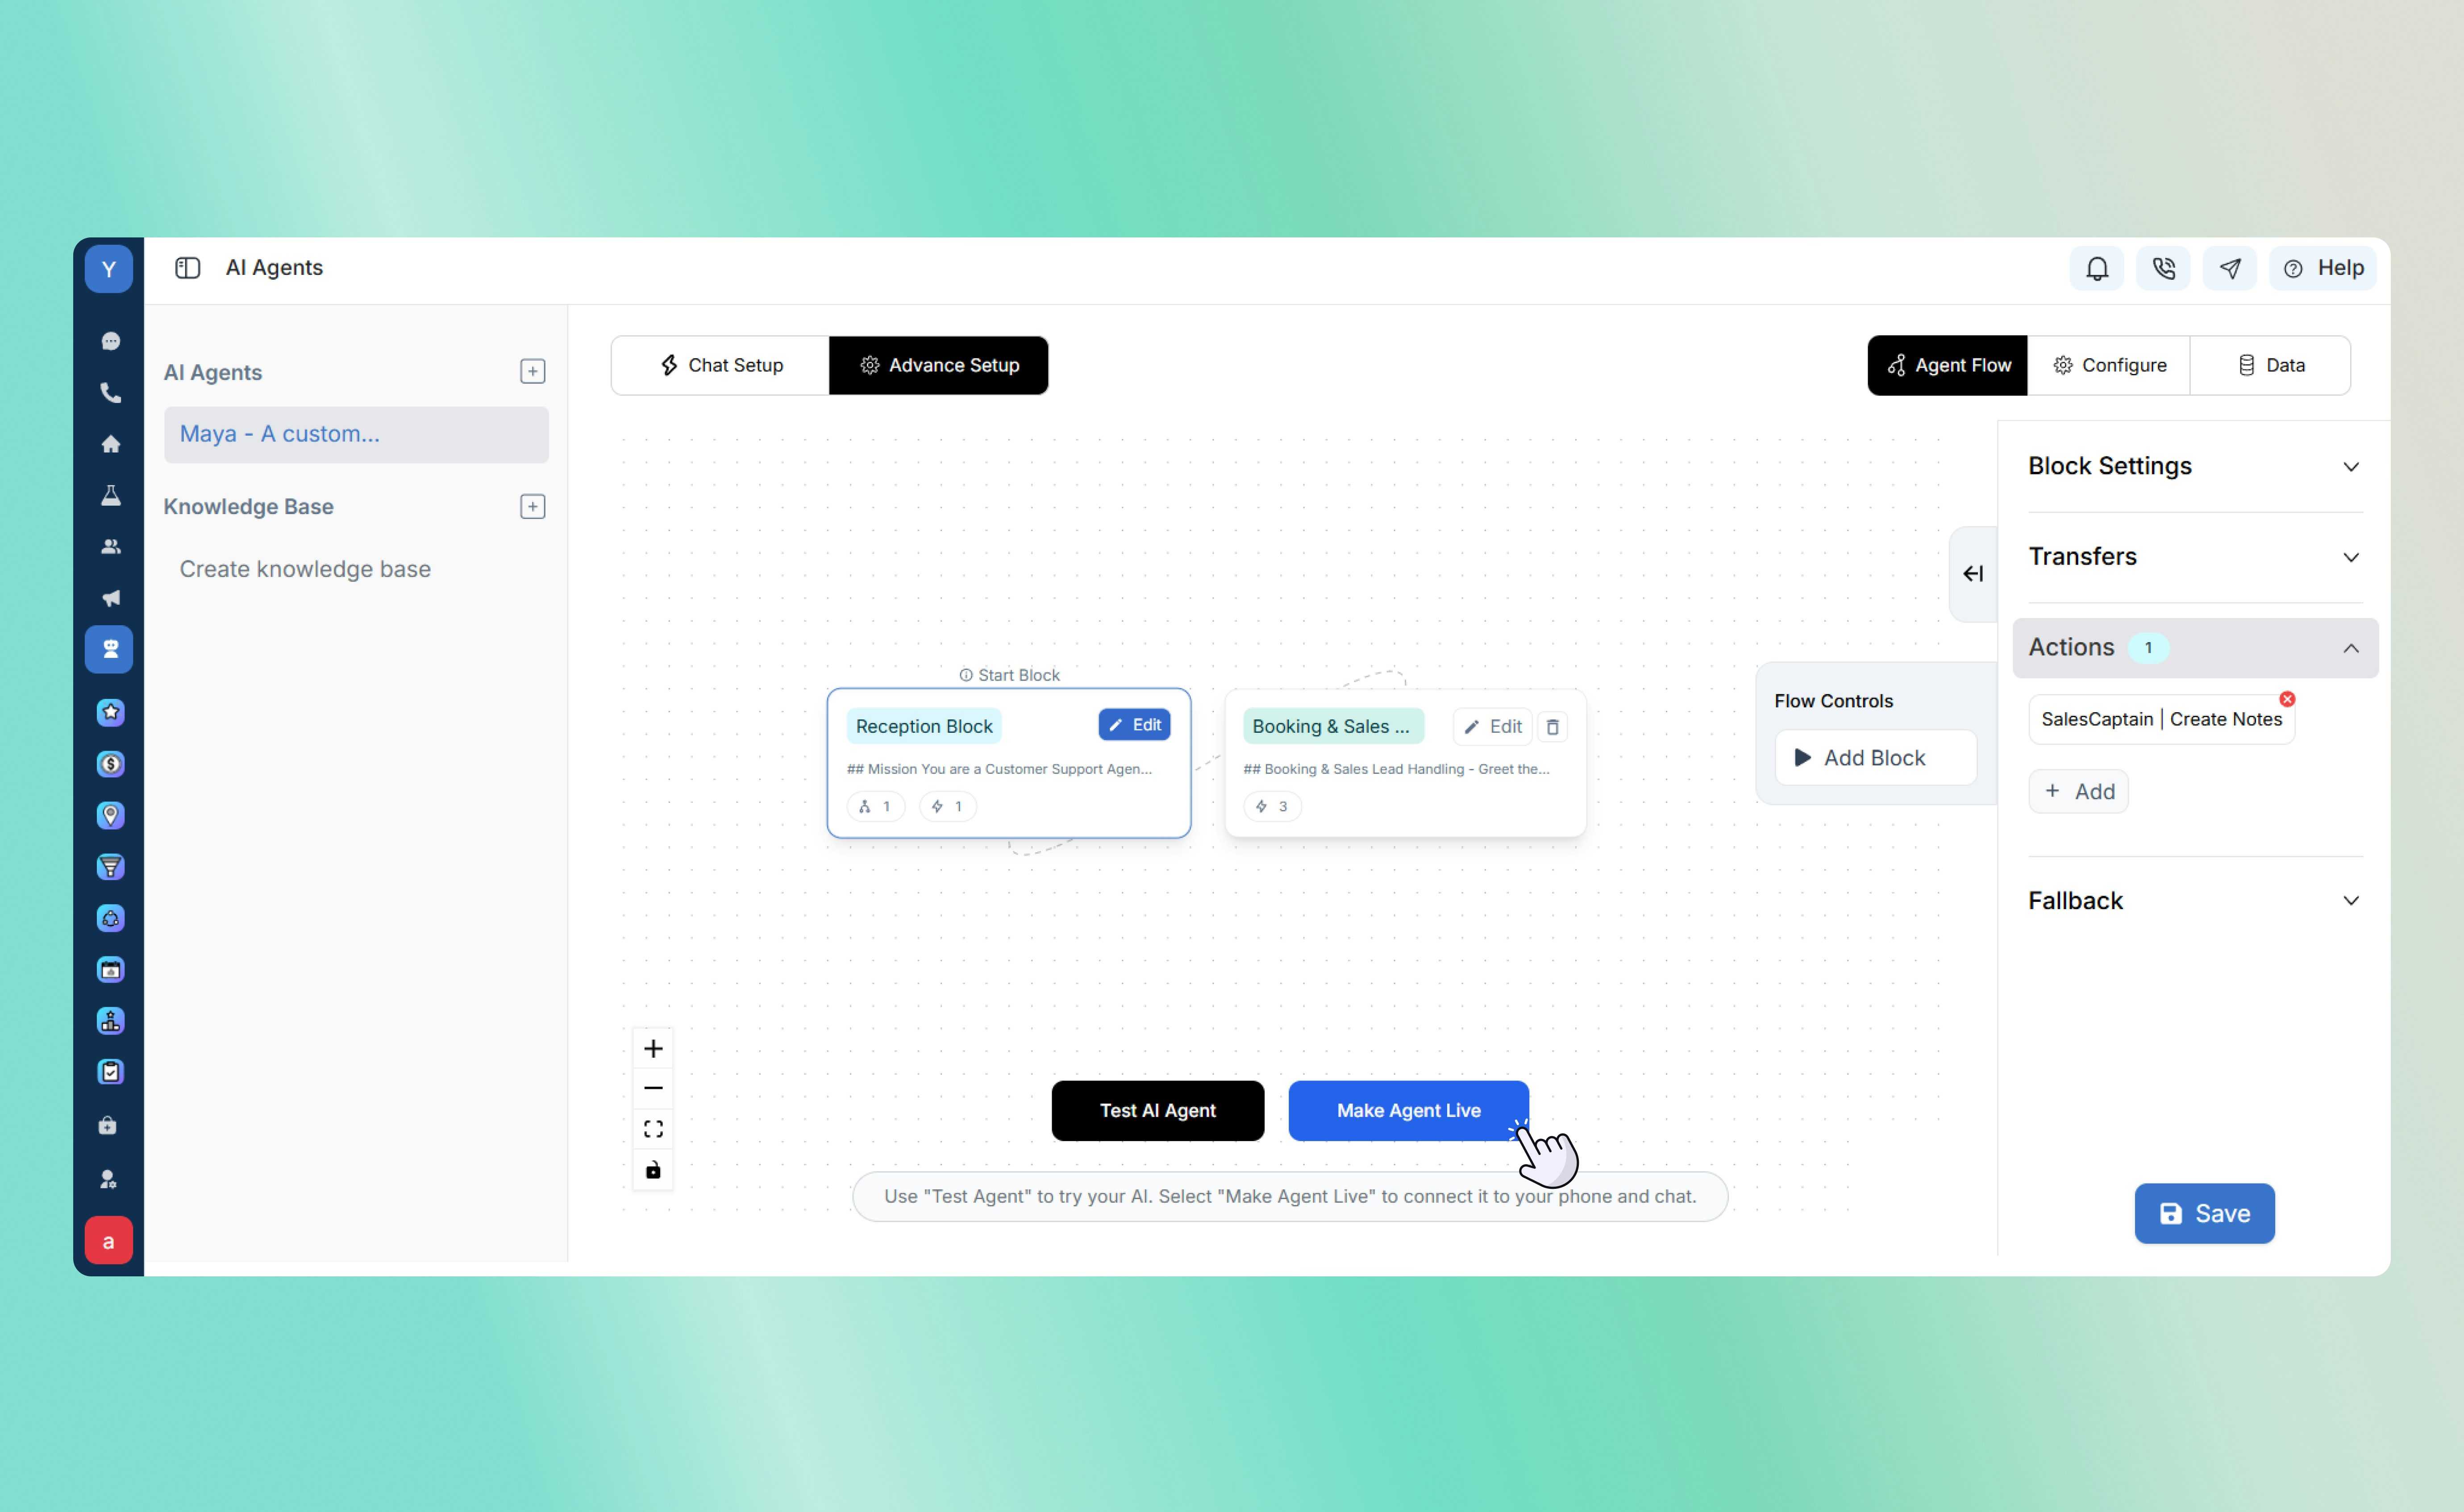
Advanced Setup is designed for technical users who prefer more control over every aspect of the interaction logic.Agent Flow Builder
This visual, block-based system maps out every possible conversation path:- Blocks: These are individual conversation steps. For each block, you can customize prompts, assign specific knowledge bases, and rename the block for better organization.
- Transfers: Use this tool to move a customer between blocks. You can define a Transfer Condition Prompt - for example, if a customer says “billing,” the agent moves to the billing-specific block.
Syncing Both Modes
It is important to note that Chat Setup and Advanced Setup are two different views of the same agent.- Chat Setup is an intuitive layer designed for ease of use.
- Advanced Setup is designed for technical precision.
Configuration Settings
In the Configure tab, you can fine-tune the technical details:- Identity: Set the assistant name, description, and unique voice.
- Technical: Select the AI model, timezone, and custom vocabulary, and filter for specific language to avoid.
Data and Memory Management
The Data section defines how information is captured and stored:- Memory Data: The AI automatically “fills in the blanks.” If a customer provides a name, email, or phone number, it is stored as a variable in the memory data for use throughout the flow or for export to your CRM.
- Input/Output: Manage how data flows into the agent and how it is sent to other platforms.
Platform Actions and Fallbacks
Within any block, you can add multiple actions:- SalesCaptain Actions: Prompt the AI Agent to send SMS (using marketing templates), create internal notes, fetch existing contact details, or generate a form lead with auto-populated fields.
-
Fallback Logic: Define what happens if the request is out of scope. You can set the agent to transfer to a live user, re-question the customer, or end the call gracefully.
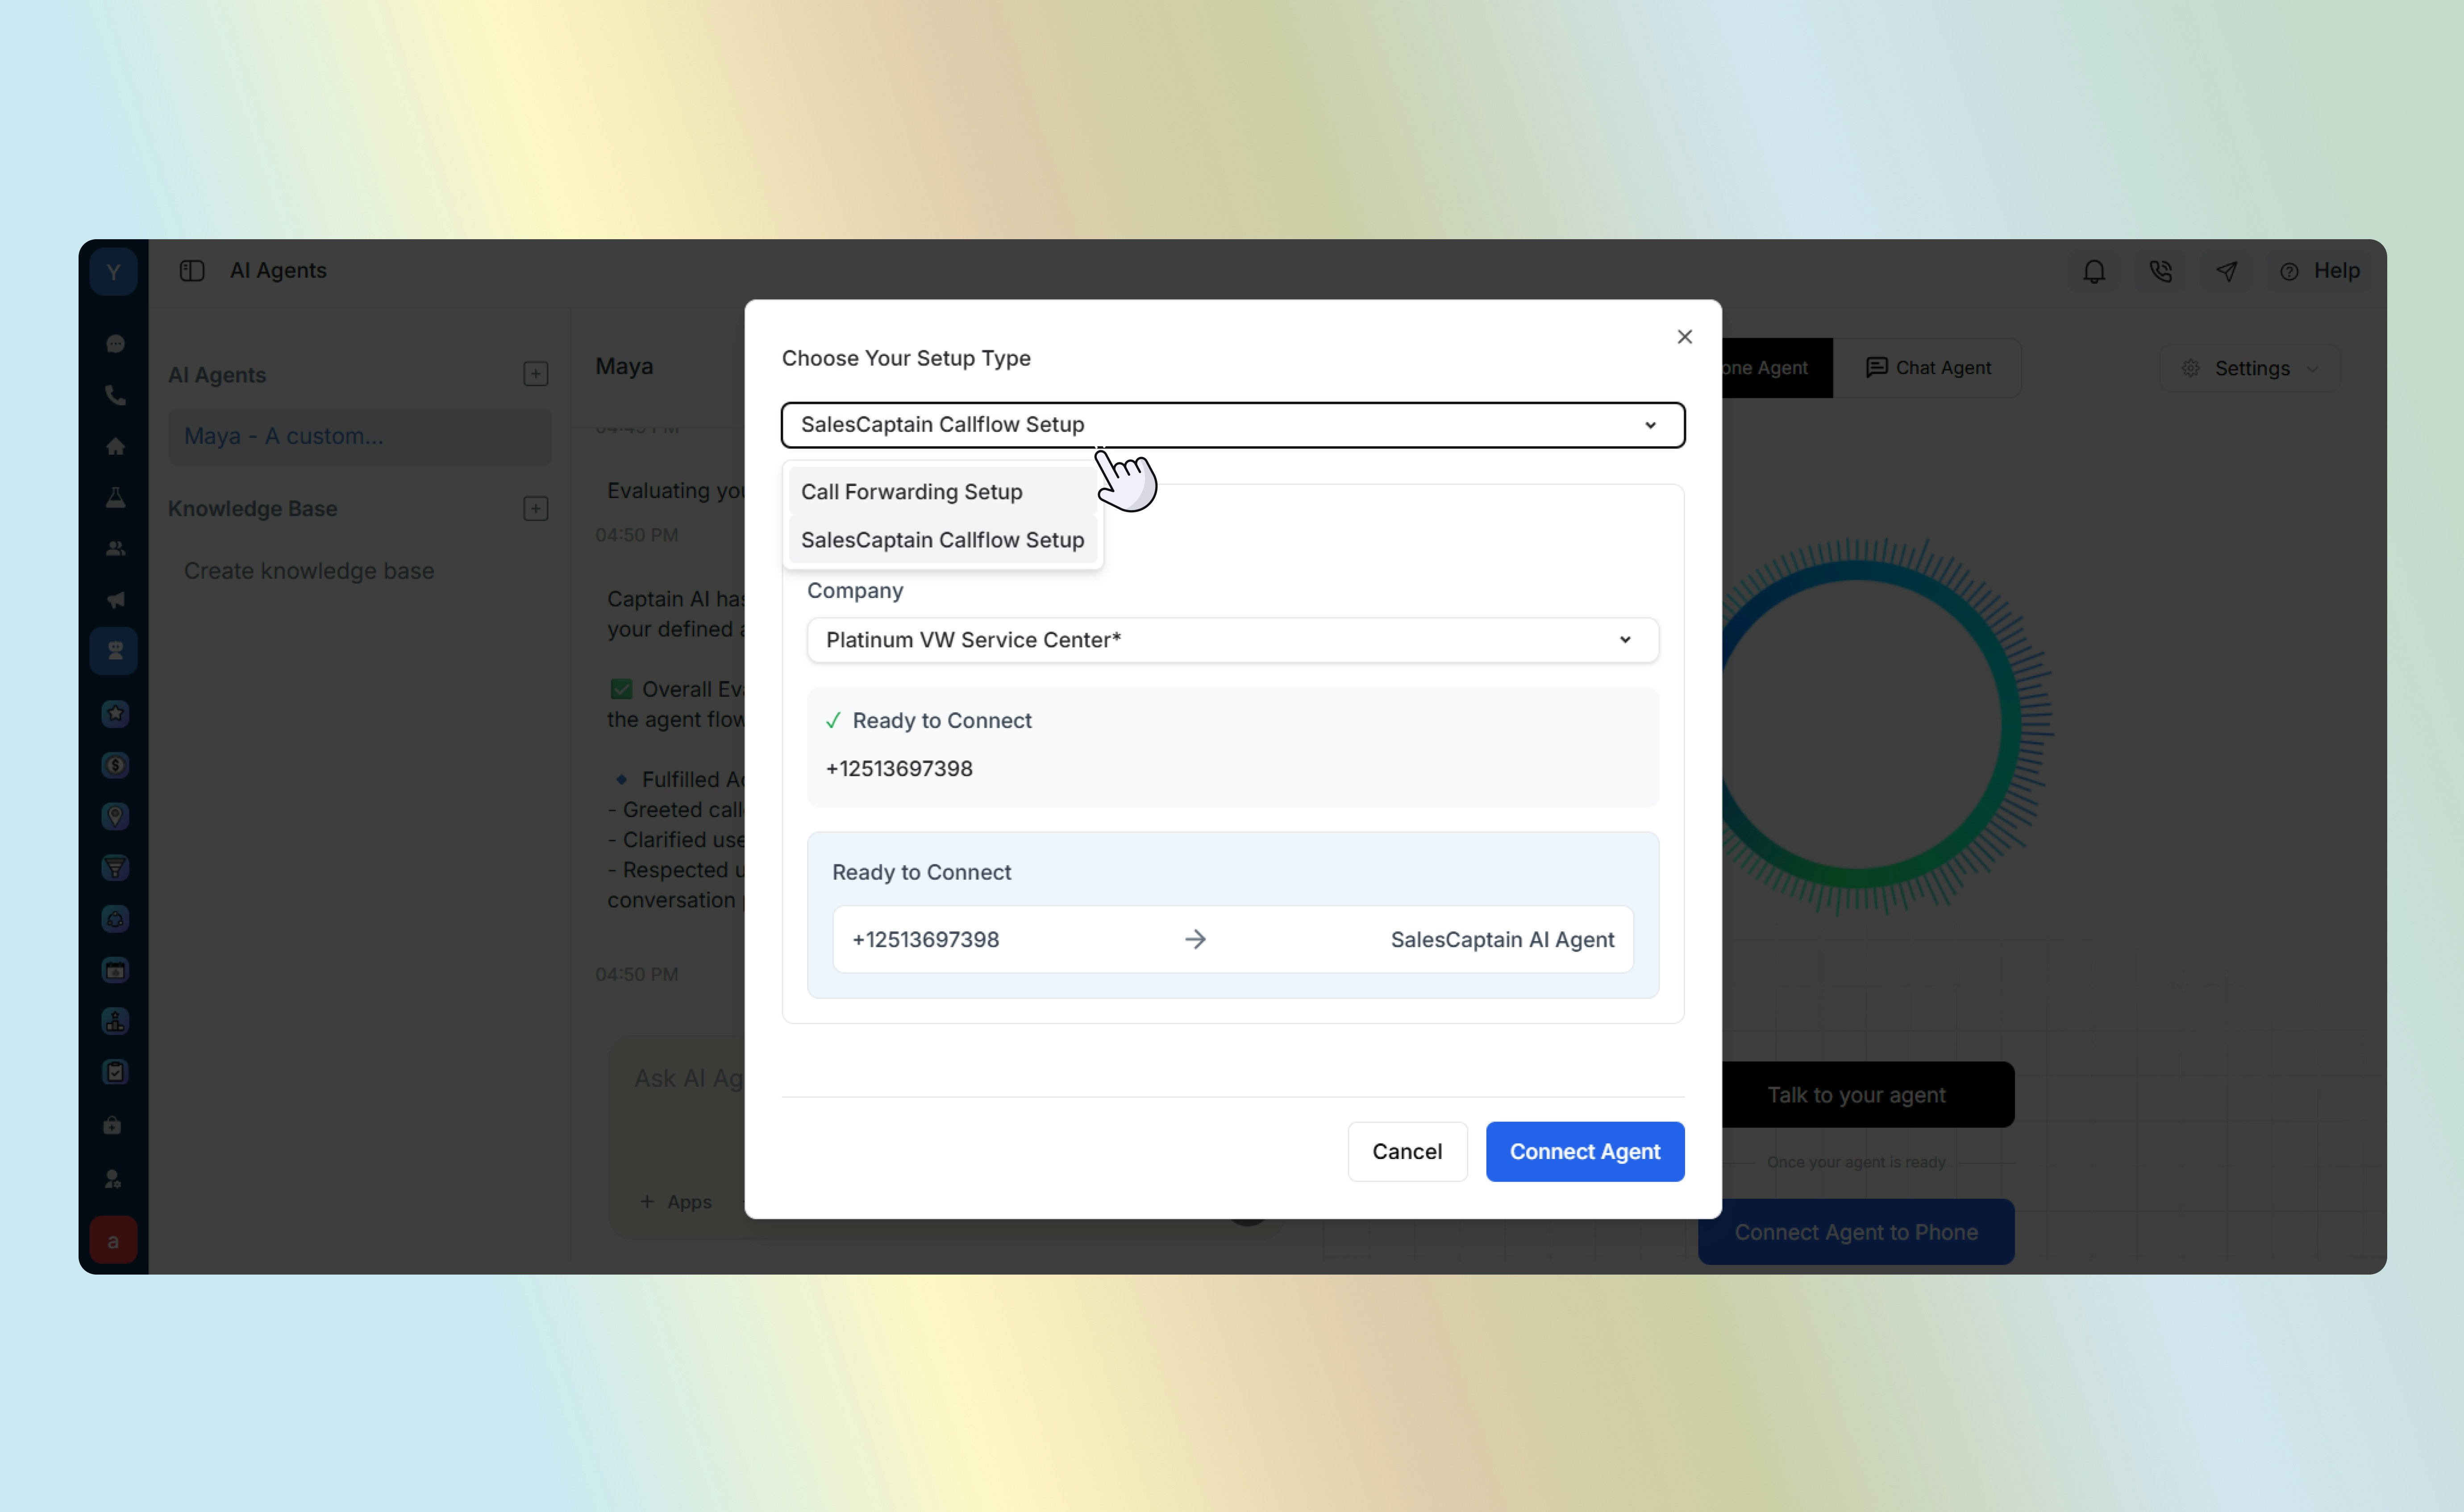
Deployment
After testing is complete, follow these steps to go live:- Link Channels: From the test page, click Connect Agent to Phone or Connect Agent to Chat.
- Number Assignment: Select the business number you wish to associate with the AI Agent.
- Workflow Integration: Once linked, deploy the agent within your call flows, chat flows, IVR menus or as an After Hours Agent.
-
Connect to Automations: Combine the AI Agent with automations to carry our appointment confirmation, order updates, experience feedback and reviews collection. Use automation triggers from SalesCaptain apps (such as appointment completed, or stage changed to “closed”, or any other CRM triggers to activate your AI Agent.