Why IVR Menus Matter
An IVR menu is often the first interaction your caller has with your business. A clear, professional menu:- Lets callers quickly choose the right department or service
- Reduces the need for manual call transfers
- Filters out spam and unwanted calls
- Keeps after-hours or high-volume periods manageable
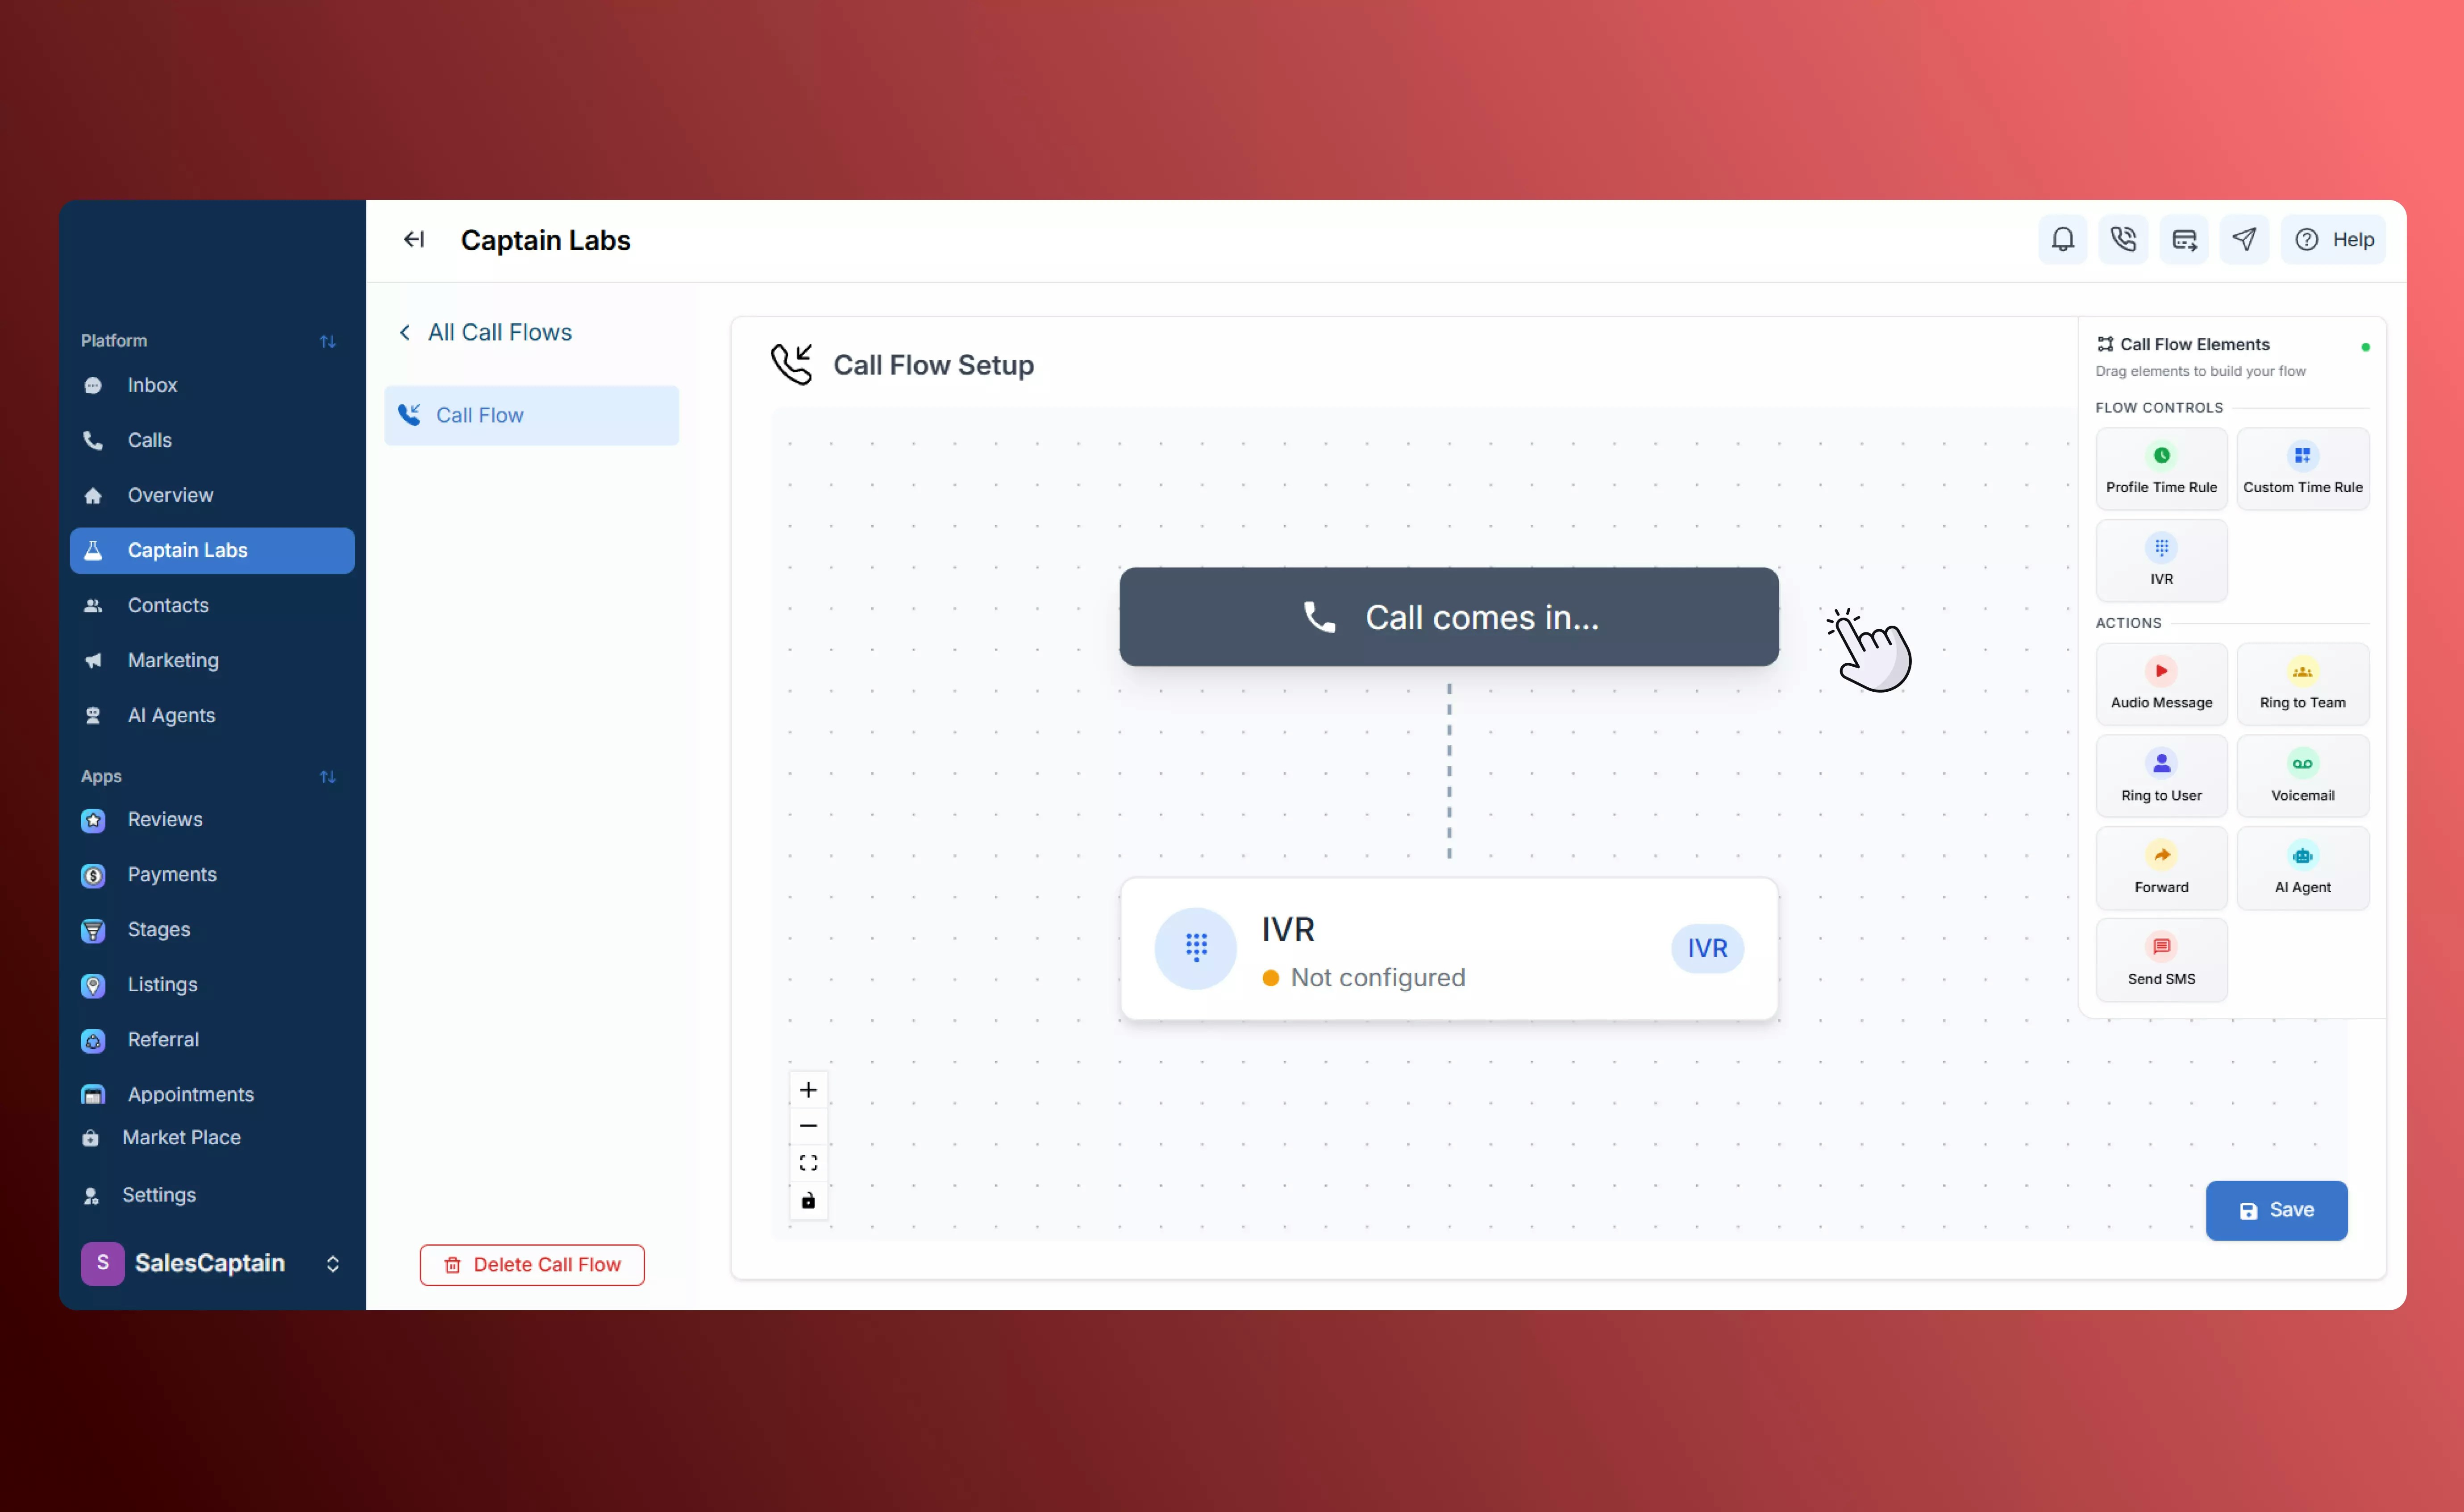
Adding IVR Menus to a Call Flow
Setting up an IVR menu in SalesCaptain is simple:-
In the Call Flows editor, drag the IVR Menu element from the right-hand panel into your workspace.
-
Add a greeting or menu prompt. For example: “Press 1 for Sales, Press 2 for Support.” You can upload a prerecorded message or type text for our text-to-speech engine.
You can also enable automatic announcement of the menu options, or disable it if your audio or text already includes them.
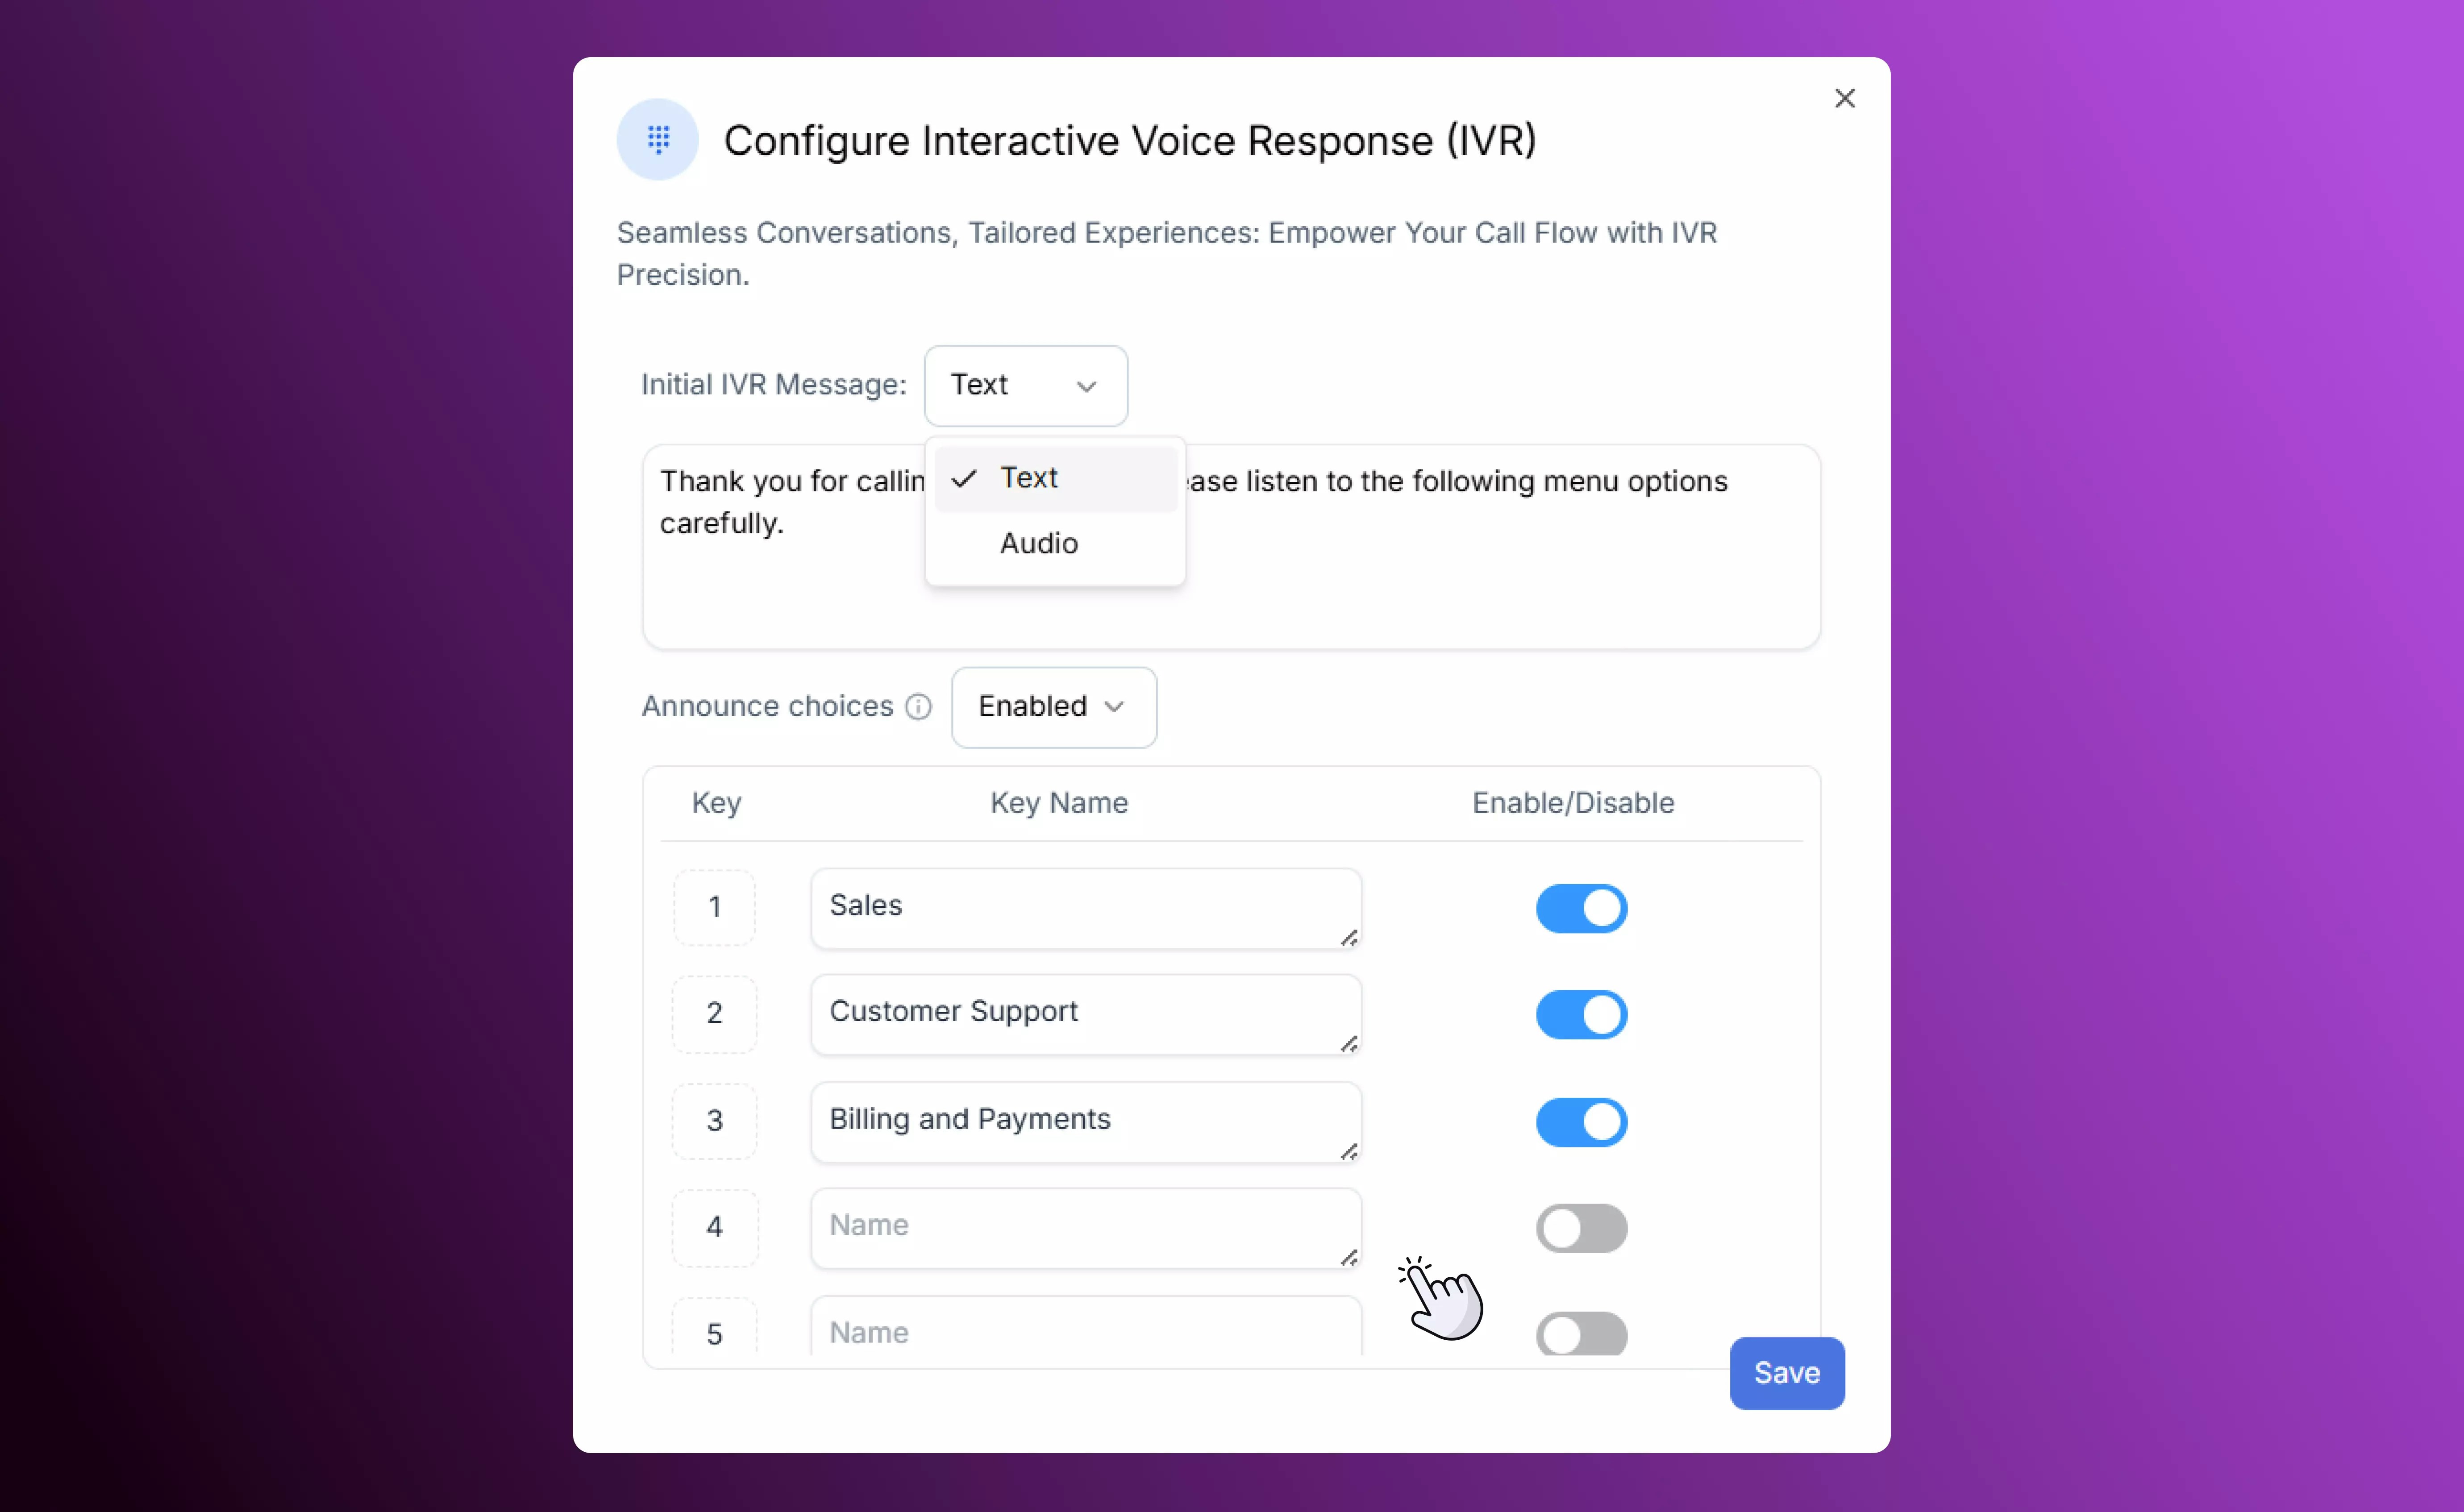
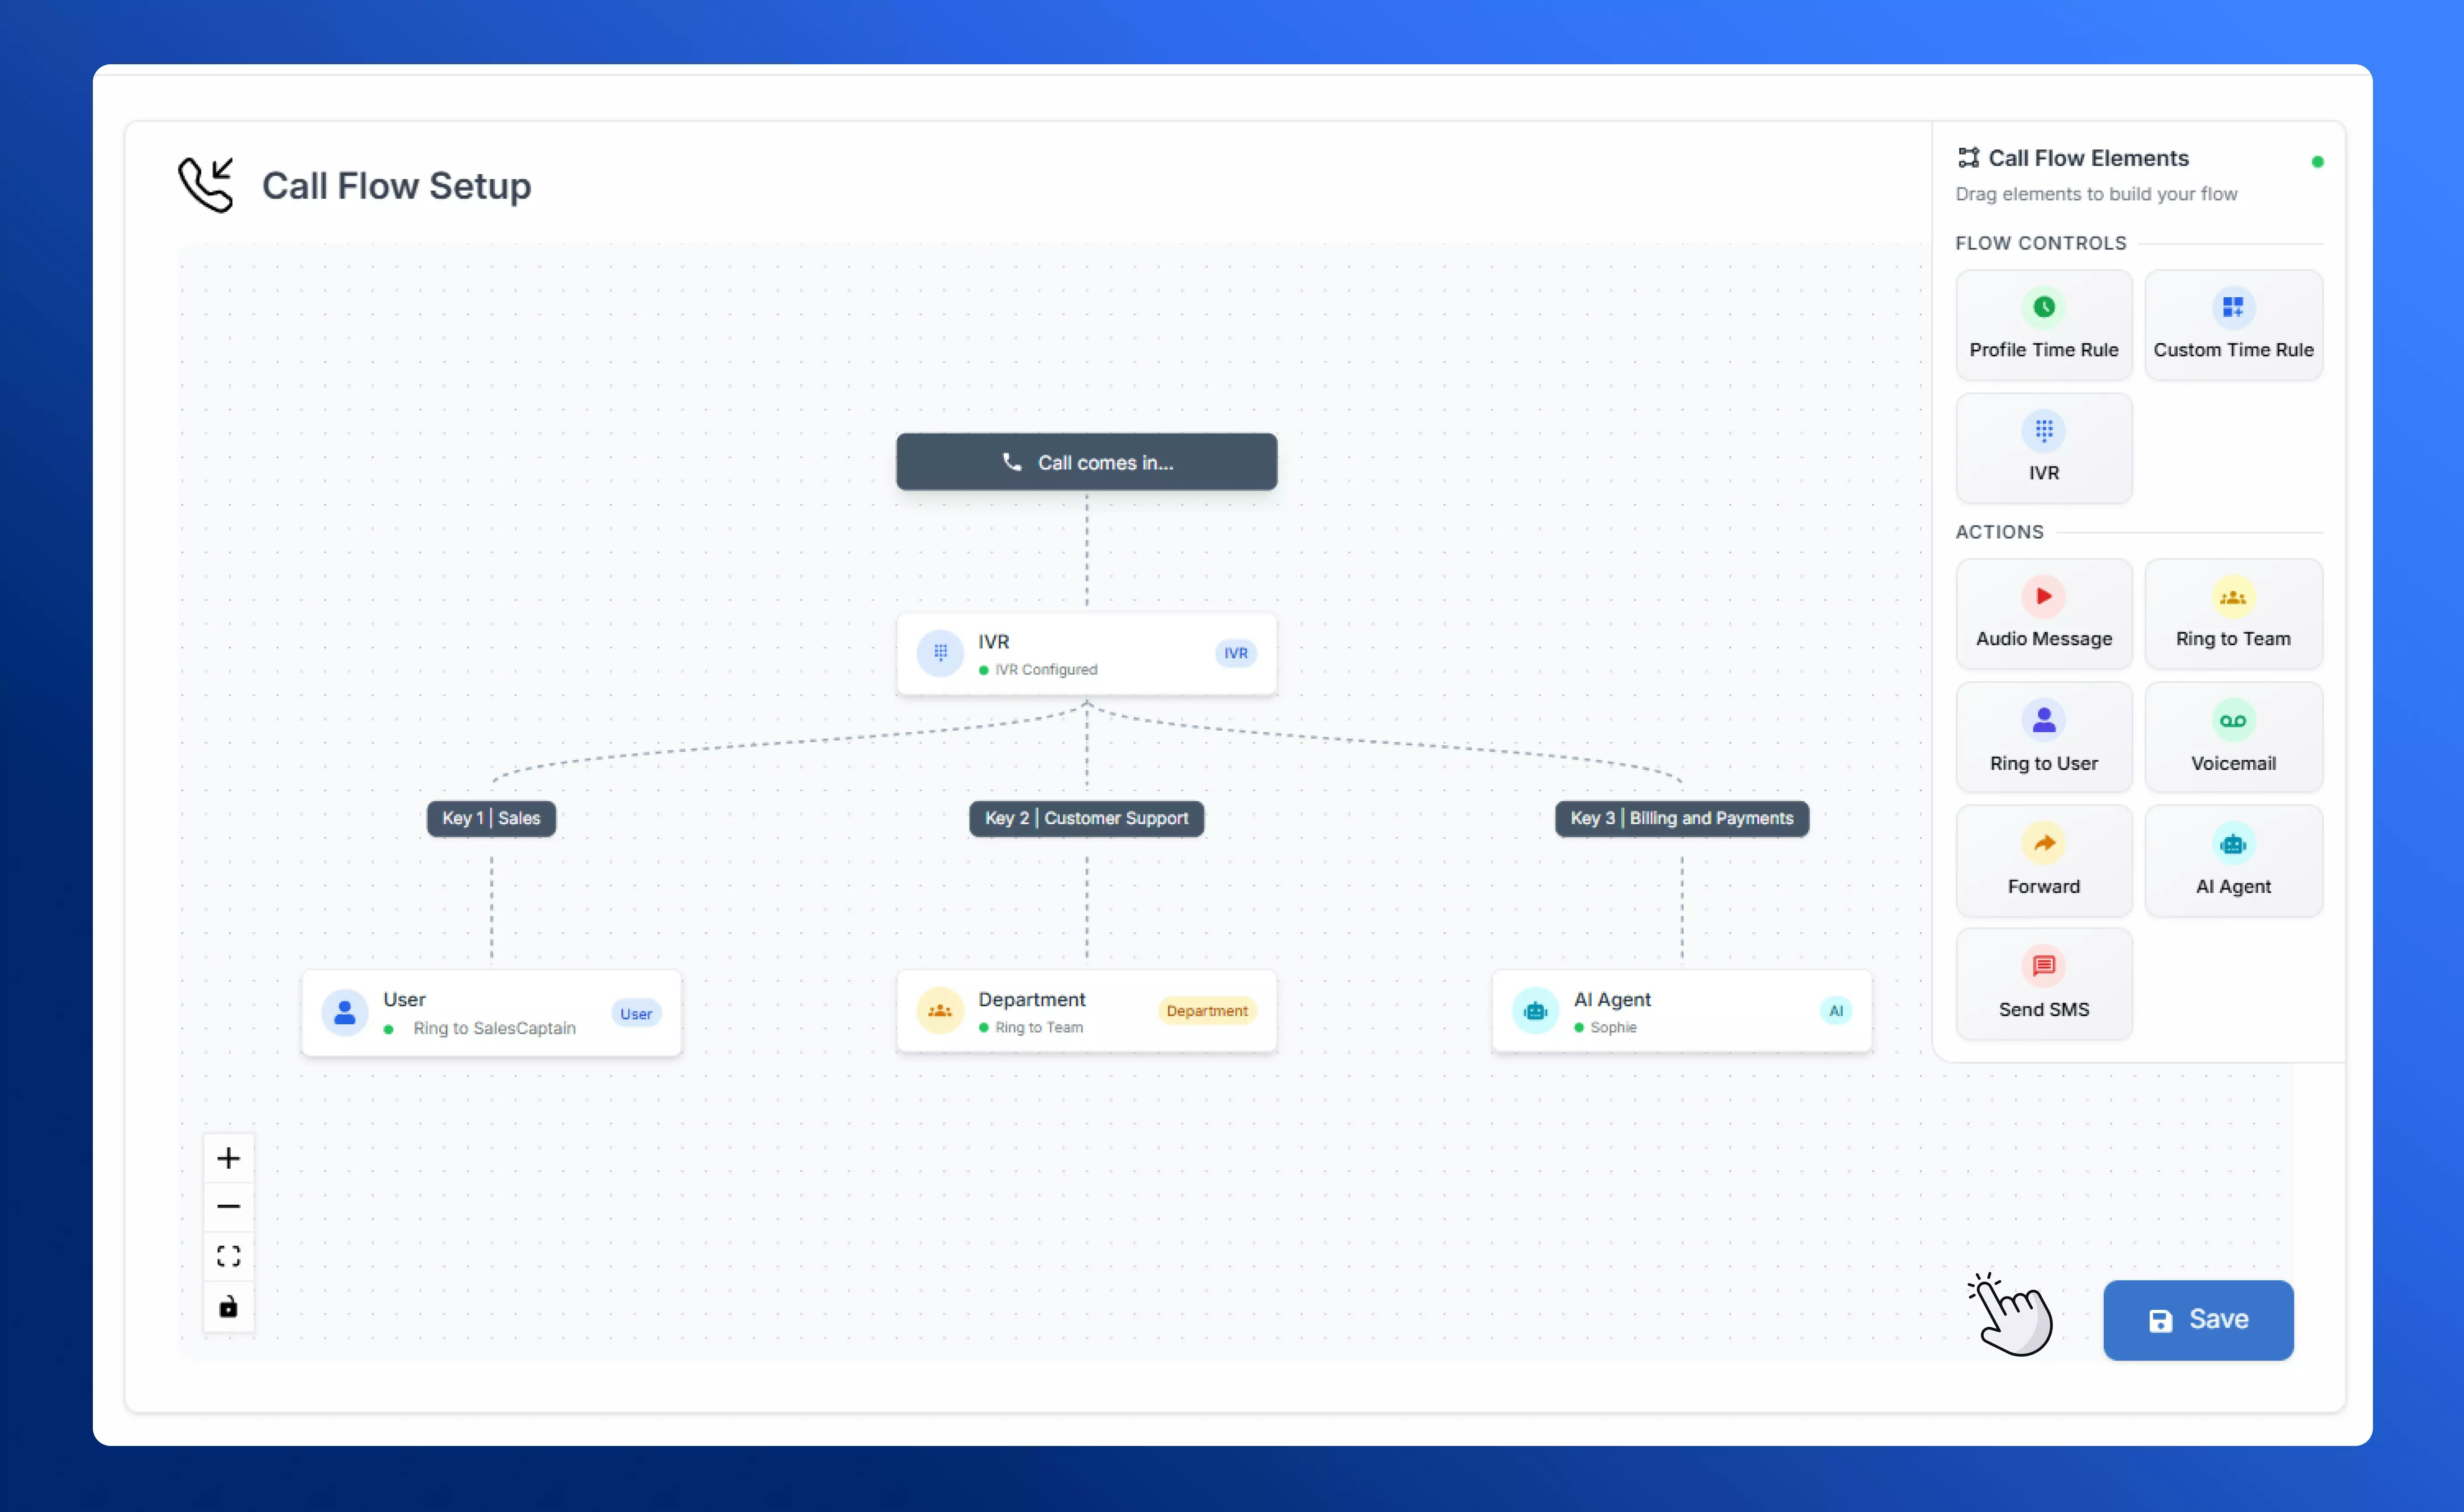
- Define your menu options. For each number pressed, you can route the caller to another branch in your flow, a specific agent or team, voicemail, or even an AI Agent.
Best Practices
- Keep menus short and clear. Too many options can confuse callers. Keeping the choices simple still allows for filtering callers and directing them to the right place without overwhelming them.
- Use IVR to pre-qualify or filter. For example, send “Press 9” to reach an AI Agent or voicemail after hours.
- Combine with Time Rules. Route menu options differently during business hours vs. after hours for a seamless experience.